User Roles
User Roles Settings
The User Roles setting screen will display the Default User Roles permission settings for the Administrator, Editor, and Viewer roles. As an Account Admin you can edit the permissions for the default user roles operations and data object access. You can also create new default or custom user roles.
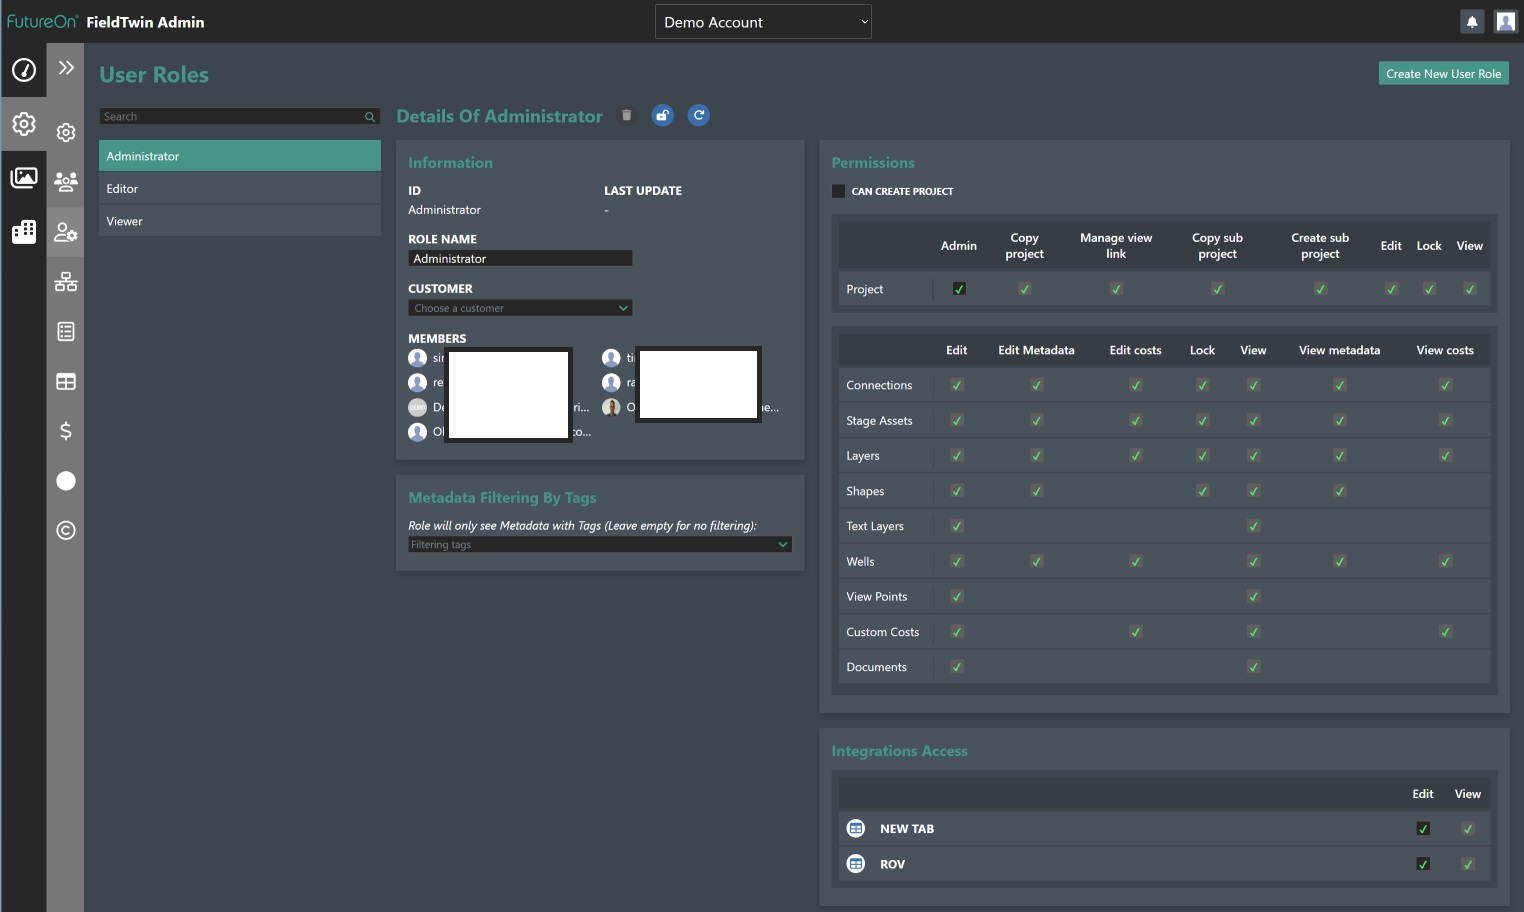
When you select a default user role you can also choose to assign that role to a specific customer if that has been defined under the Customer section of the Input Configuration Screen as described elsewhere in this documentation as shown here:
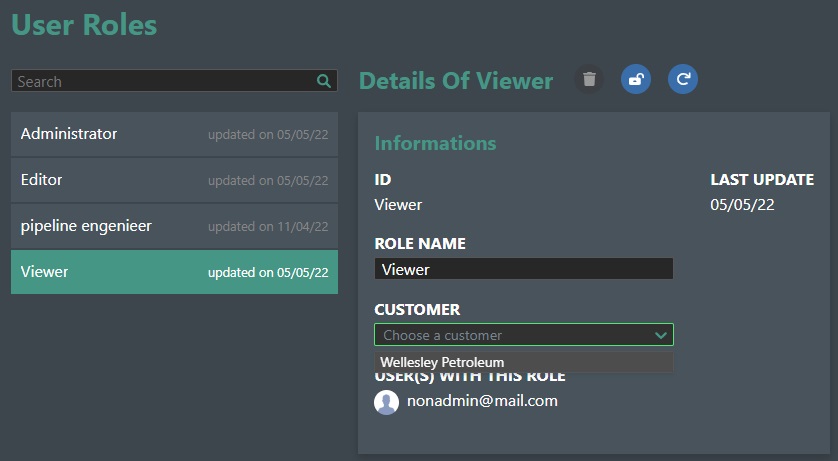
This means you can adjust default user roles also based on Customer as a criterion.
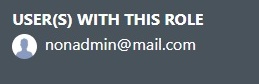
The User(s) With This Role section will list all users with assigned this role, and also list all the projects they are a member of for this account.
Exclude Role - If you click the padlock icon as shown in the illustration below the current User role will be excluded and not available for selection. You will see a Lock icon appearing after the role name in the User Roles list on the left-hand side of the screen signifying that the role has been excluded. This mean that the role will not be available for selection in the Users settings screen where you assign roles to users. Click icon again to include it again.

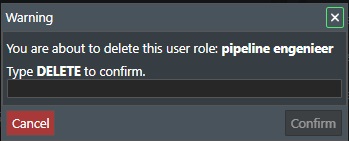
Delete - Click on the Trashcan icon to delete the selected user role. A dialog will prompt you to confirm the deletion as it cannot be undone:
Note! - You cannot delete default user roles.
Restore the default settings for this role - Click on the Undo icon to restore the system default user roles of Administrator, Editor, or Viewer to standard permissions.
Permission Table
The Permission table is where all user roles operations and data object access are controlled for each role. See the illustrations below for the default Administrator role permissions:
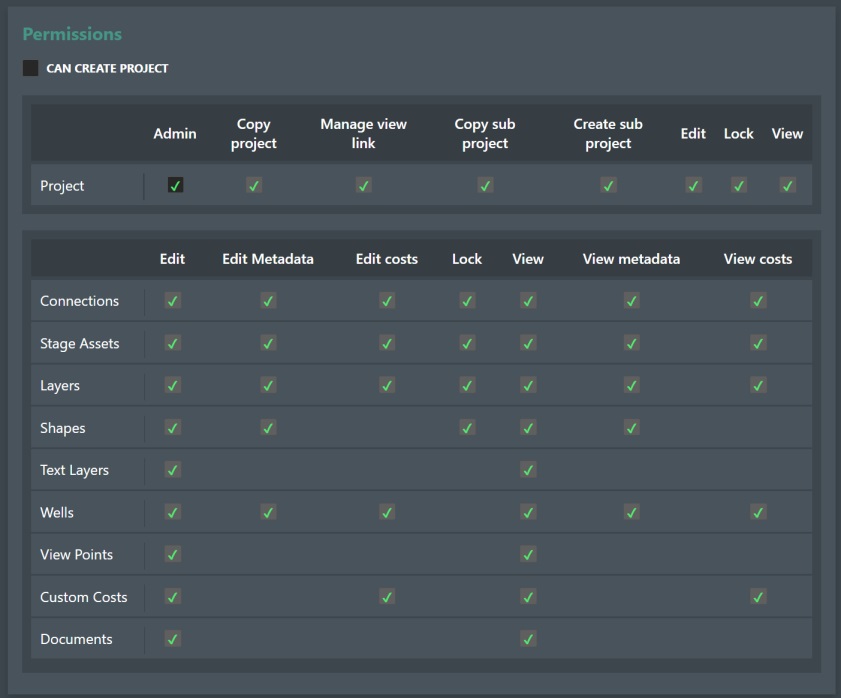
Can Create Project - Check this box if the new user role will be allowed to create projects in FieldTwin.
If checked then tick the appropriate Project Permissions as shown below for the user role:
Admin - If checked, grants the user project admin rights.
GLTF backdrop export - If checked, enables the GLTF export capabilities under the FT Design Export Menu.
Copy project - If checked, allows the project to be copied.
Manage view link - If checked, allows the creation of view links.
Copy sub project - If checked, allows sub project(s) to be copied.
Create sub project - If checked, allows sub project(s) to be created.
Edit - If checked, allows project edit rights.
Lock - If checked, allows the project to be locked.
View - If checked, allows project view rights.
Data Type Permissions
This table allows you to controll the following user right for the various FT Data Types as described below with respect to Create, Edit, Edit Metadata, Edit Costs, Lock, View, View Metadata, and View Costs.
Connections - Check the appropriate user rights for connection.
Stage Assets - Check the appropriate user rights for stage assets.
Layers - Check the appropriate user rights for layers.
Shapes - Check the appropriate user rights for shapes.
Text Layers - Check the appropriate user rights for text layers.
Wells - Check the appropriate user rights for wells.
View Points - Check the appropriate user rights for view points.
Custom Costs - Check the appropriate user rights for custom costs.
Documents - Check the appropriate user rights for documents.
Tasks - Check the appropriate user rights for tasks.
Annotations - Check the appropriate user rights for annotations.
To edit the role permissions simply check the appropriate check boxes for the various operations and data access in the Permissions table section. Note! If the Admin setting is checked under project this means that all the permissions are available. To edit any other setting, you must then uncheck this.
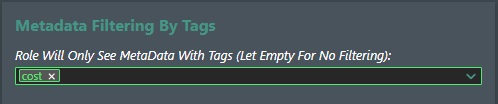
Metadata Filtering by Tags
You can define what Metadata a user role should see by using the Tags feature during Metadata creation. If you add a tag for e.g. projectcost and then add this to a new user role as shown in the illustration below that user will only see metadata that has been tagged with "projectcost".
Integration Access - This section is where all 3rd party or optional Tabs integrations that are provided and registered with the system will be listed:
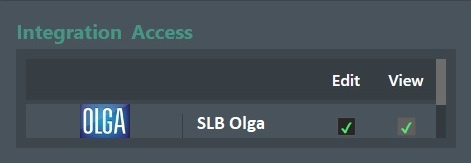
This means that you can assign access to integration Tabs to the assigned default or custom user role. For each integration tab you can select if the Role should be able to Edit or View the integration tab. Simply use the check boxes for each listed tab to select the view or edit capabilities. Note! If a user role can Edit it means that the role also can View the tab.
Create a New User Role

This button will create a new custom user role where you as an admin can select the appropriate permissions for your company project workflow. See illustration below where we create a customer user role for a Reservoir Engineer:

Then you select the different permissions to assign to the new role you just created using the Permission Table.