FieldTwin Vision
FieldTwin Vision is an integration in the FieldTwin platform that allows account administrators to upload and process the data captured by the remotely operated vehicles (ROVs) used for the critical inspection and maintenance of underwater assets, encompassing pipelines, wells, and other equipment.
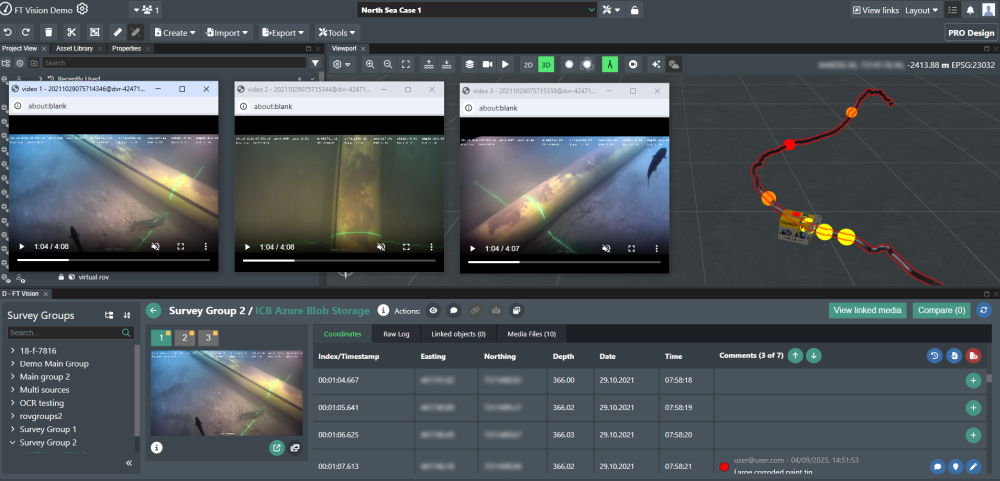
The processed data can be accessed through the FieldTwin Designer part of the integration by any user of the account. It significantly enhances their ability to monitor, analyze, and make informed decisions.
Release Notes
The latest release notes for version 2.1.7 released on July 14th, 2026.
Installation
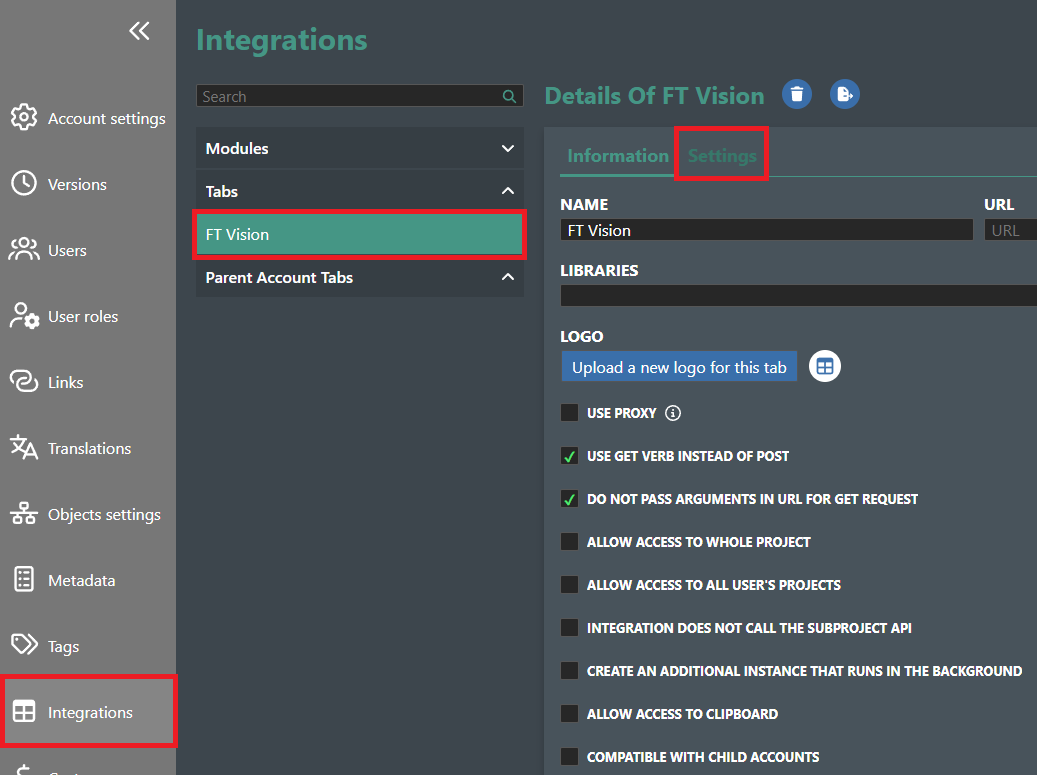
In FieldTwin Admin, go to Account Settings, then Integrations, and click Create New Tab. Set the following values:
Name:                           FieldTwin Vision
URL:                            https://ft-vision-main.TBD/user
Account Settings URL:           https://ft-vision-main.TBD/admin
Use GET verb:                   yes
Do not pass arguments in URL:   yes
Tab Display Position:           Module Panel (default)
Configuration
In FieldTwin Admin, go to Account Settings, then Integrations, FieldTwin Vision (or the name you entered in the installation above) and click Settings.
FieldTwin Vision Admin
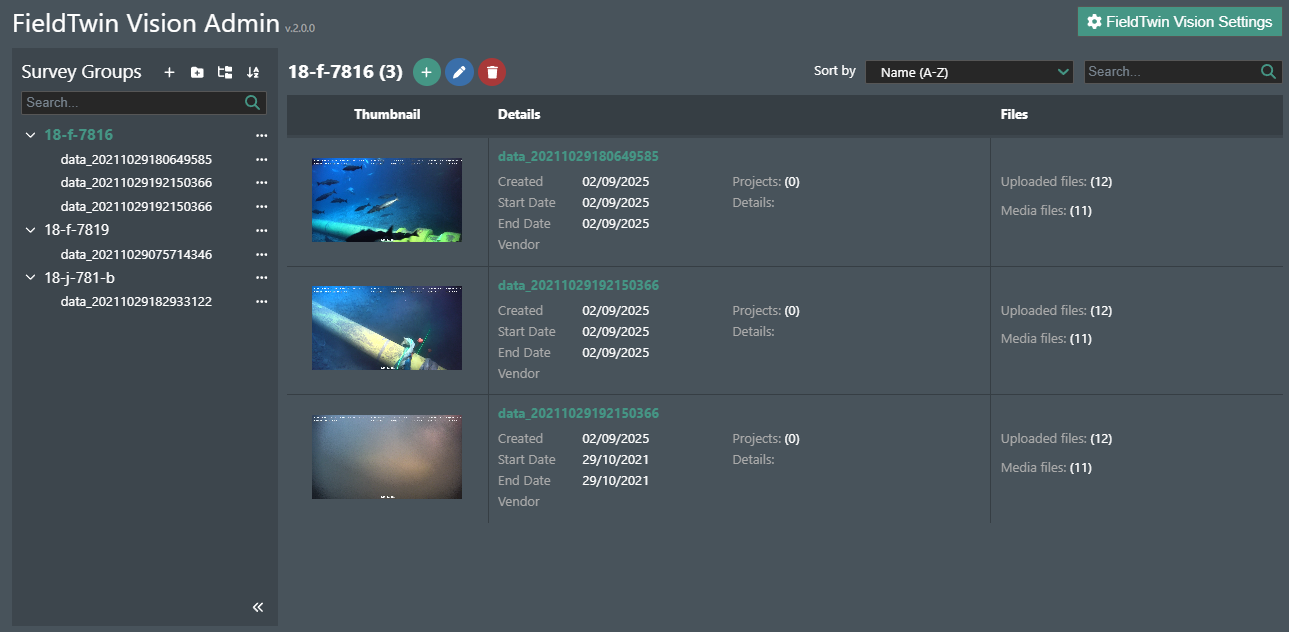
In FieldTwin Vision Admin you will set up survey groups, manage video uploads and more.
Survey Groups tree view
This is where the account administrator can create new survey media groups and survey groups or edit and delete existing ones.
The screen is divided into two accordions:
- Folders - shows the main folders located within the selected group.
- Survey Groups - shows the survey groups located within the selected group.
FieldTwin Vision Settings
The FieldTwin Vision settings allow you to save different column mapping options for coordinates and comments files.
These mappings are required to successfully process CSV files with coordinates and Excel files with comments (available only through the FieldTwin Designer part of the integration).
You can also configure Azure Blob Storage information to upload survey files from external storage.
To access the settings, click on the "FieldTwin Vision Settings" button.

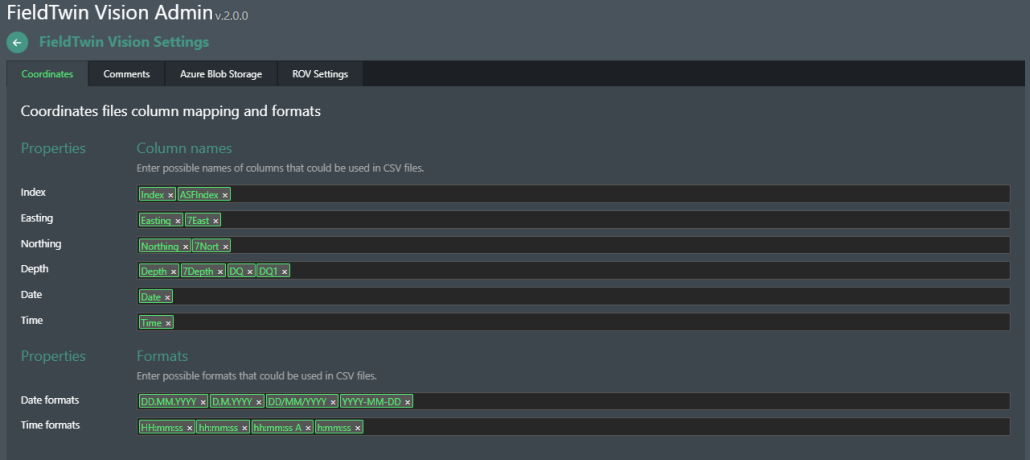
Coordinates files column mapping and formats:
Comments files column mapping:
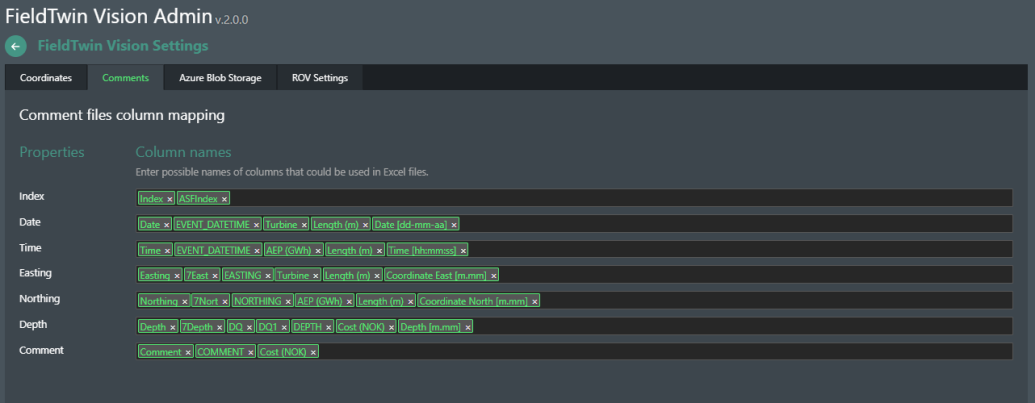
To add a new column mapping, click on the desired property field and enter the mapping.
To delete an existing mapping, click the X next to it or use backspace.
Changes are saved automatically when you exit the field.
Azure Blob Storage settings:
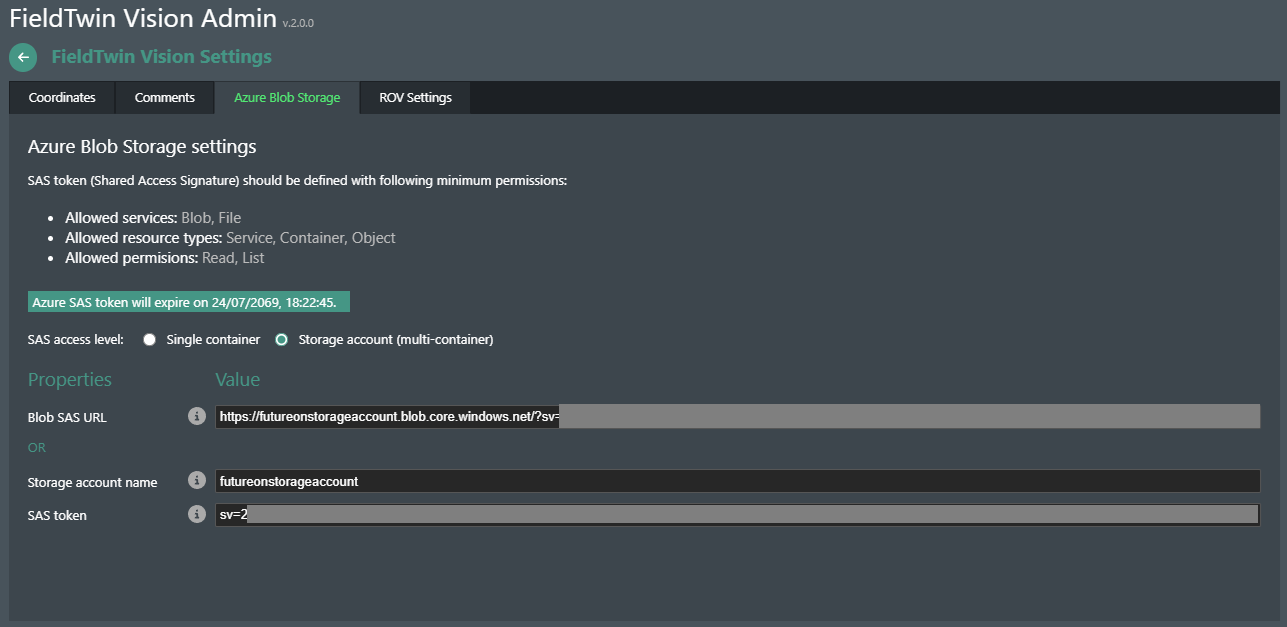
The SAS access level has two options:
- Single container - limits the access to only a single container
- Storage account (multi-container) - lists all containers within the connected storage account.
A Blob SAS URL or SAS token and storage account name are required in order to allow file sharing to the FieldTwin Vision integration.
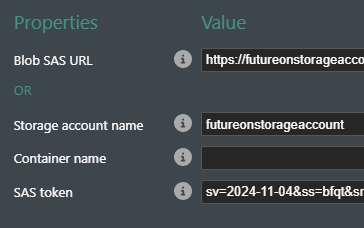
If Single container access has been selected, an additional Container name field will appear under the Properties section, where the name of the container available for access should be entered
ROV Settings:
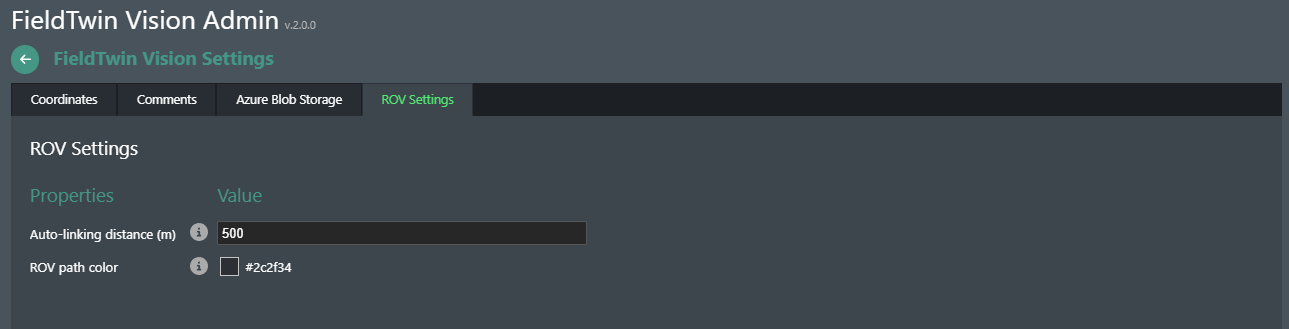
The ROV path color field changes the default path color used for newly created survey groups.
The ROV path thickness (m) field changes the default path width used for newly created survey groups.
The ROV camera far plane (m) field sets the maximum virtual distance the ROV camera can 'see'.
The ROV locate distance (m) field sets the camera distance from the located object in meters. Leave empty to automatically fit the asset.
The Channel identifiers field specifies the patterns used to detect whether uploaded video files (via the bulk upload functionality) are chunked and to determine their corresponding recording channel. Matching is case-insensitive, so capitalization is not required.
The Timestamp identifiers field specifies the timestamp patterns used in your filenames to automatically extract and sort recordings by date/time (when uploaded from the bulk upload functionality). Pattern must include all components: year, month, day, hour, minute, and second.
Survey Groups tree view actions
The tree view actions can be seen here:
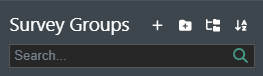
 add new folder.
 create survey groups in bulk.
 expand all nested levels if collapsed or collapse them if expanded.
 sort the groups alphabetically (A-Z) or (Z-A).
The search bar allows you to find any group which contains either a folder or survey group with the input.
At the bottom is a button for hiding the tree.
 shrink the horizontal size of the tree.

 can be used to expand the tree back to its original size.
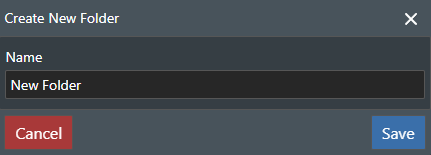
When adding a new folder, a popup will appear.
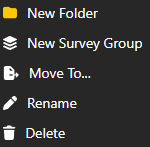
Next to every folder and survey group listed in the tree-view there is a hamburger menu, where you have the following options available for each type:
Top level folders:
The options allow the user to add a new folder or survey group, rename, delete or move the top level folder.
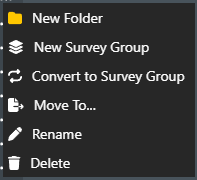
Inner folders:
The options allow the user to add a new folder or survey group, rename, move or delete the folder.
In addition the "Convert to Survey Group" option is available, which converts the folder to a survey group, allowing the user to upload files and generate a survey path for it.
Survey Groups:
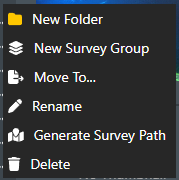
The options allow the user to add a new folder or survey group, rename, move or delete the survey group.
In addition, the "Generate Survey Path" option is available, via which a survey path can be generated for the selected survey group based on the available files.
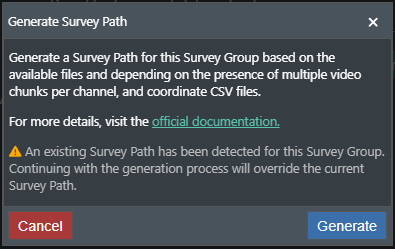
If the Generate Survey Path option is selected for a survey group that already has a survey path, the following popup will appear:
If the survey group does not have a generated survey path, a standard informative popup will appear:
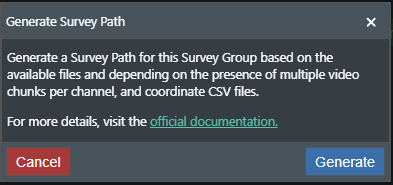
Clicking on  will start the process for the survey group.
Initial view
Upon selecting a top level folder, the options for adding a new folder or survey group, renaming and deleting the current folder can also be accessed from the top section of the main screen.

 add new folder.
 add new survey group.
 rename the current folder.
 delete the current folder.
On the right side, there are options for sorting and searching the folder in order to find a specific survey group or inner folder.
The default sorting is by the name (A-Z), but you can change it to one of the following options:
- Newest First
- Name (A-Z)
- Name (Z-A)
- Start date
- End date
- Vendor
You can search by any of those parameters in the search bar.

Create a single new Folder
To create a single new folder, select the "New Folder" option from the hamburger menu or click on the icon.
A new page will load to the right side of the tree view.

The following actions are located at the top of the page:
 - change the name of the folder.
- - delete the folder.
 - convert the folder to a survey group.
If a folder contains nested folders or survey groups, all contents will be listed in their own collapsable accordions labelled Folders and Survey Groups.
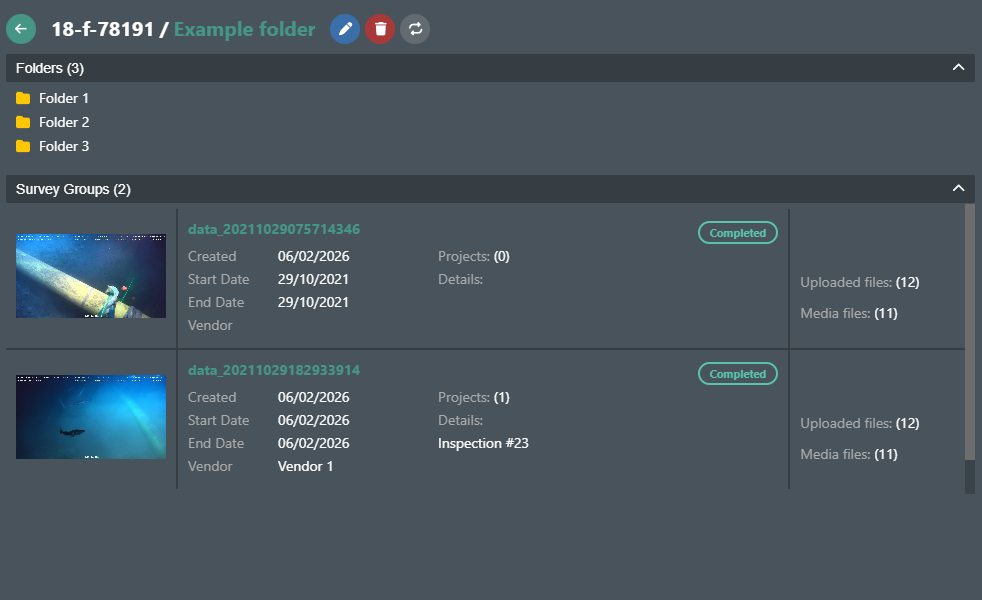
The accordions can be collapsed using the  button visible on the far right side.

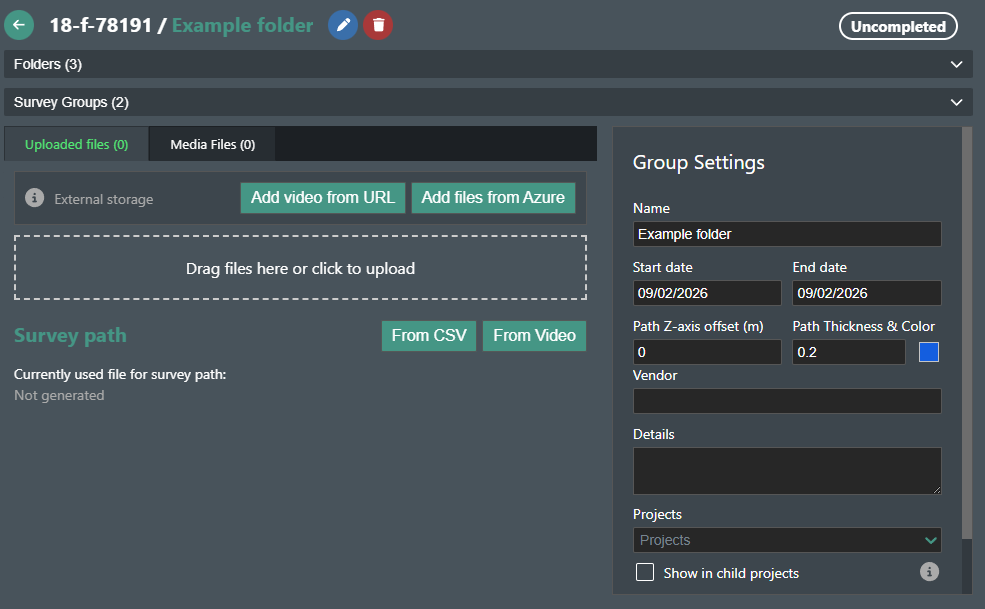
The main folder can be converted to a standard survey group by clicking from the header section, or by using the "Convert to Survey Group" option from the hamburger menu.
Doing this will add a new section at the bottom of the page with the survey group settings and file upload options, allowing the user to manage the survey group as needed.
Create a single new Survey Group
To create a single new survey group, select the "New Survey group" option from the hamburger menu or click on the icon.
A new page will load to the right side of the tree view.
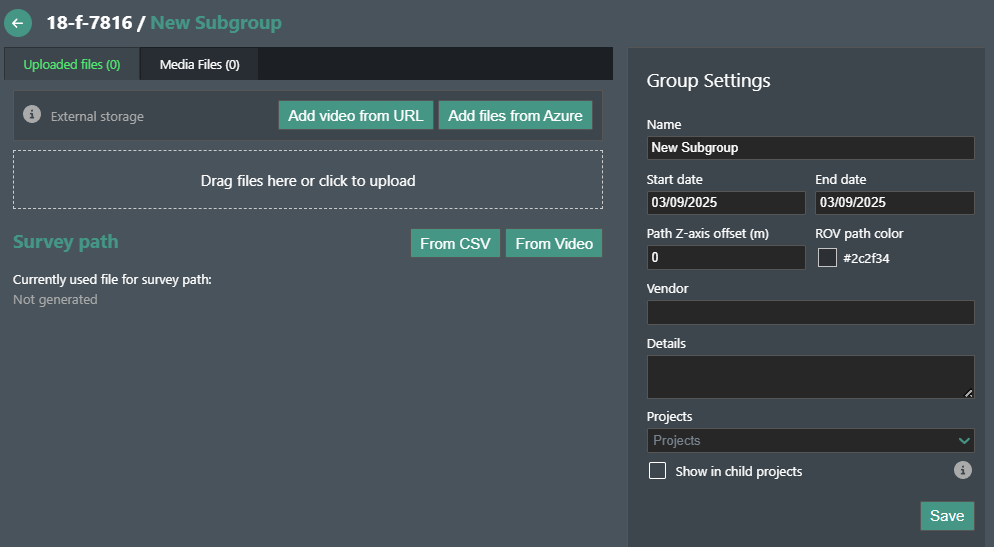
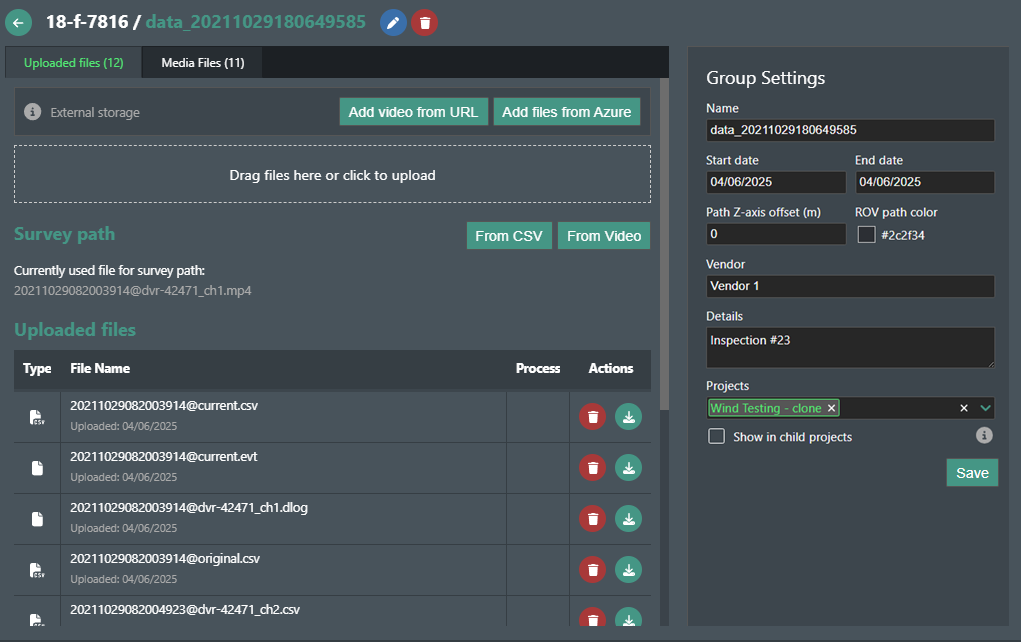
The following information regarding the Group Settings can be set or updated:
- A new name
- Start date
- End date
- Path Z-axis offset
- ROV path thickness
- ROV path color
- Vendor
- Details
- Show in child projects
Note: It is necessary to link the survey group to a project from the "Projects" dropdown, so it can appear in the FieldTwin Designer part of the integration.
After entering all the information about the new survey group, click the "Save" button to save the changes.
Survey group statuses
Each survey group displays one of the following processing statuses in the top right section of the screen:
 - the survey group does not have a coordinates file.
 - the processing of the survey group has not begun (bulk upload process)
 - the survey group is currently being processed
 - the survey group has been processed successfully
 - the survey group processing has failed. A retry icon is also paired with this status, which can be used to quickly restart the process.
If the processing status is either Pending, Processing or Failed, an indicator with the relative color also appears next to the name of the survey group in the tree-view.
Uploading survey files
For uploading survey files, there are three options:
1. Add files from Azure
If the Azure Blob Storage settings are properly configured and a valid SAS token is provided, you can click on the "Add files from Azure" button and a file explorer will open.

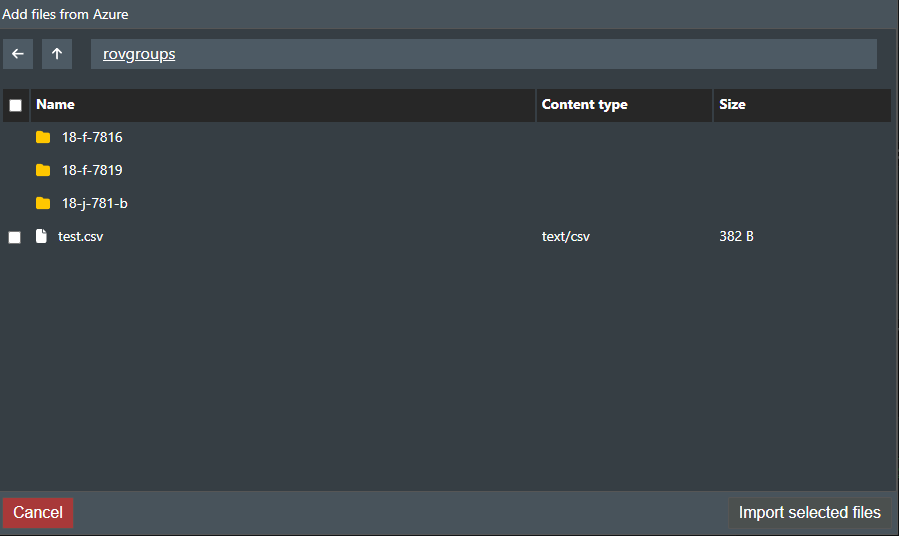
Select the needed survey files by clicking on the checkbox next to them and press the "Import selected files" button.
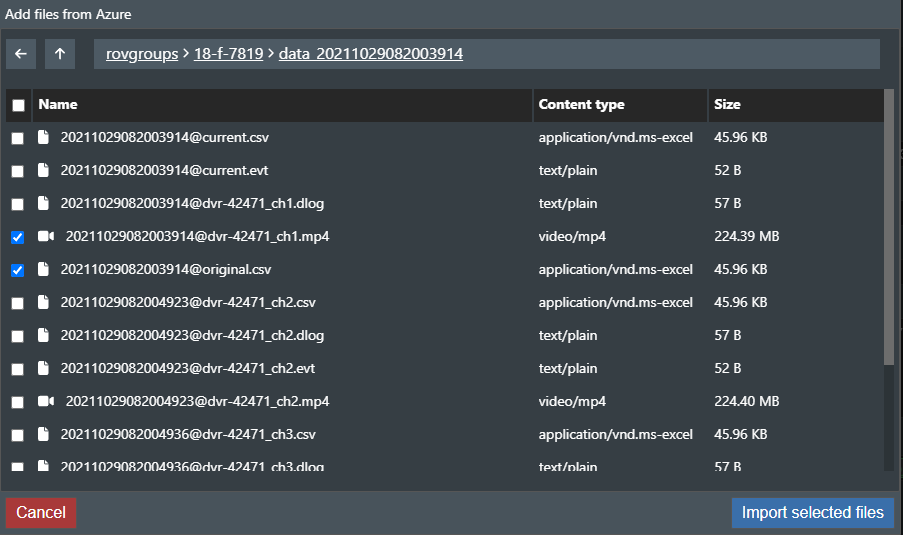
All files can be selected at once using the checkbox at the top.
When importing files from an external source, all files are uploaded except videos. Video URL references are saved in the 'Media Files' tab instead.
2. Add video from URL
Click on the "Add video from URL" button and this popup will appear.

Enter a name and a valid URL for the video and click "Confirm"
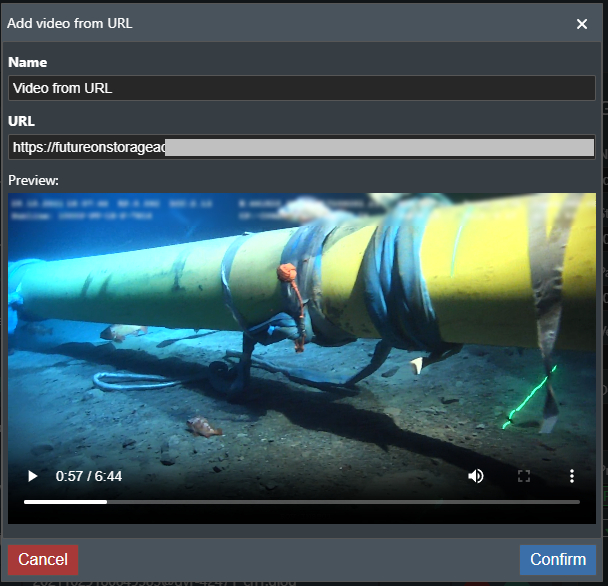
The video file will appear in the "Media Files" tab.
3. Manual upload
You can click on the file upload zone or drag and drop files directly into it.
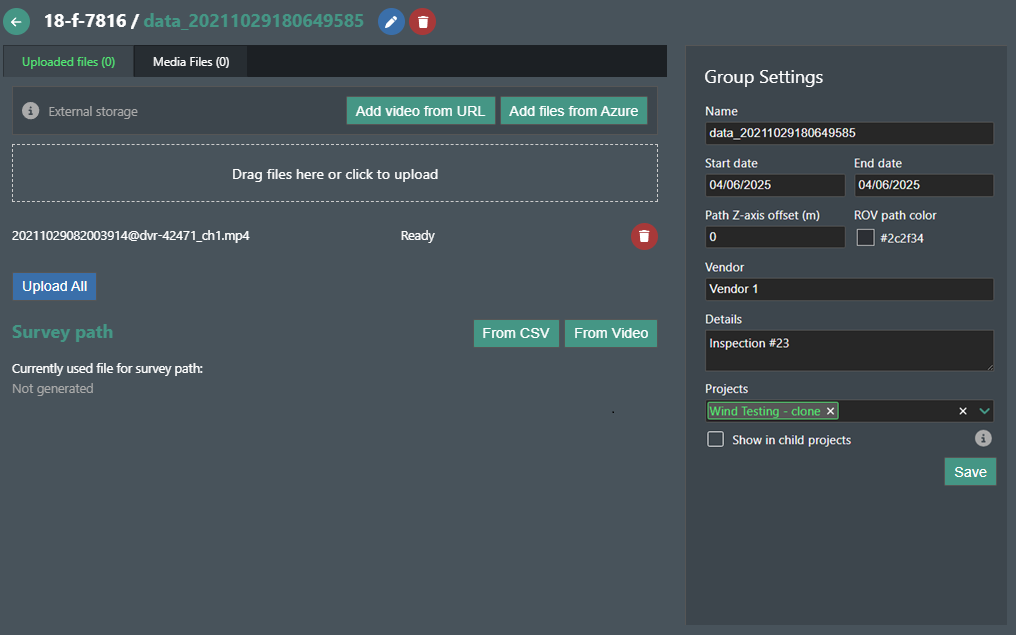
After choosing the desired files, click on the "Upload All" button.

The files will be transferred to the "Uploaded files" section, where you can see their type, name, when they were uploaded, process them, download or delete them.
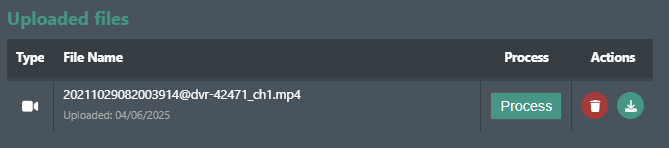
To make uploaded video and CSV files usable in the FieldTwin Designer part of the integration, you must process the videos and generate a survey path.
Initiate video processing by clicking the "Process" button next to each video file.
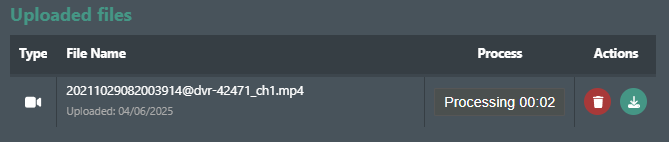
A survey path can also be generated either from a CSV file or a Video file.

From Video
Clicking the From Video button will visualise the following popup:
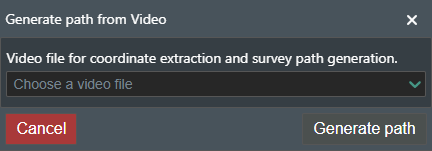
The Video file for coordinate extraction and survey path generation field specifies which video file to use for the survey path generation from the Uploaded Files and Media Files of the survey group.
After a video file is selected, pressing Generate path will start the creation of the survey path.
Optical Character Recognition (OCR) is used to extract the coordinates from the text overlay of the survey video.
Default label formats for the video coordinates overlay:
| Easting | Northing | Depth | Date | Time |
|---|---|---|---|---|
| Easting | Northing | Depth | DD.MM.YYYY | HH ss ss |
| East | North | 7Depth | DD.MM.YY | hhss |
| 7East | 7North | DQ | D.M.YYYY | hss |
| E | 7Nort | DQ1 | MM/DD/YYYY | HH:mm |
| E. | N | DPT | YYYY-MM-DD | |
| N. | D | DD-MM-YYYY | ||
| D. | DD MMM YY |
In addition to the default label formats listed above, more settings can be added through the FieldTwin Vision Settings under the Coordinates tab.
From CSV
Clicking the From CSV button will visualise the following popup:
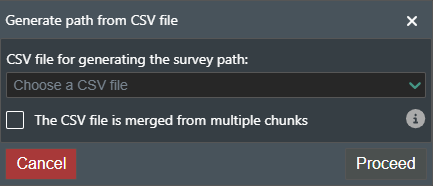
The CSV file for generating the survey path specifies which CSV coordinates file to use for the survey path generation from the Uploaded Files of the survey group.
The "The CSV file is merged from multiple chunks" checkbox allows the user to specify whether the selected coordinates file consists of multiple chunks merged together. If checked, the uploaded videos will be treated as chunks and displayed as a single merged video per channel.
After clicking Proceed, if the CSV file contains dates, but the format is missing from the FieldTwin Vision Settings, an informative popup will appear.
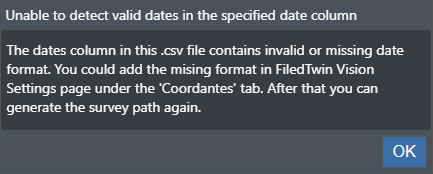
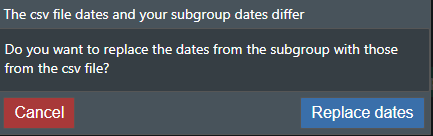
If the CSV file dates are valid, but they differ from the ones in the survey group settings, a popup will appear, asking to update them automatically.
If the CSV file has columns that are required for the coordinates generation, but are missing from FieldTwin Vision Settings, this popup is displayed, asking for manual link.
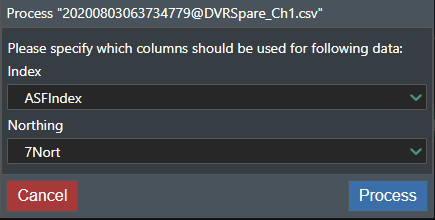
After this, these missing columns will be automatically saved in the settings and the popup will not be shown again.
All processed files will appear in the "Media Files" tab, where the user can view their type, name, updated date, and download or delete them.
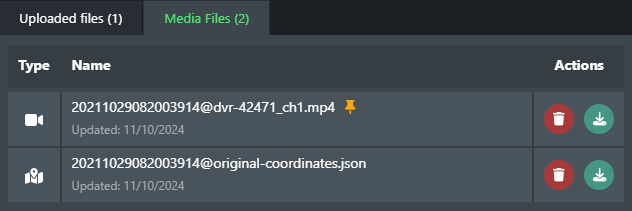
The first processed video is automatically set as the cover, meaning frames from it will be used for the survey group thumbnail.
If you have more than one processed video, a new option will appear allowing you to set any video as the cover.

 set video as cover.
- delete file.
 download file.
Create survey groups in bulk
To create multiple survey groups at once, click on the button from the top of the tree view.
This will open a new dialog:
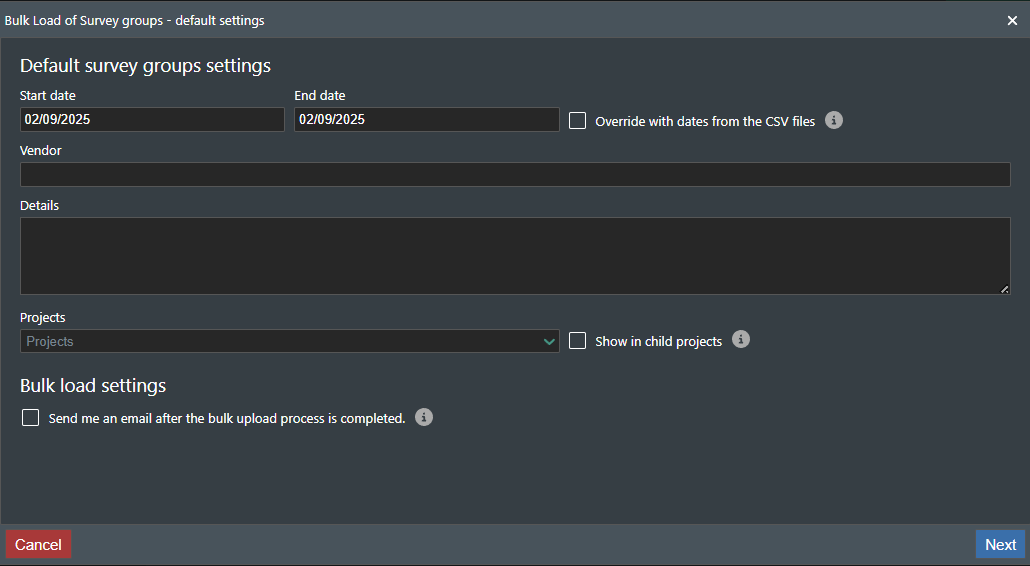
 navigates to the next page.
 closes the dialog and resets all settings and selections.
The group settings will be applied to all survey groups that are created.
Selecting the "Override with dates from the CSV files" checkbox will automatically extract dates from the survey path CSV file and pre-fill the Start date and End date fields.
For newly created survey groups to be visible in the FieldTwin Designer part of the integration, they must be linked to one or more projects. If all groups will be displayed in the same project(s), select those projects in the "Projects" dropdown. Survey groups can also be linked later through their respective settings.
Selecting the "Send me an email after the bulk upload process is completed" checkbox will send a notification to your registered email address once the bulk upload process is complete.
The folder structure option defines whether the Azure folder structure will be preserved as-is or flattened to the last two levels.
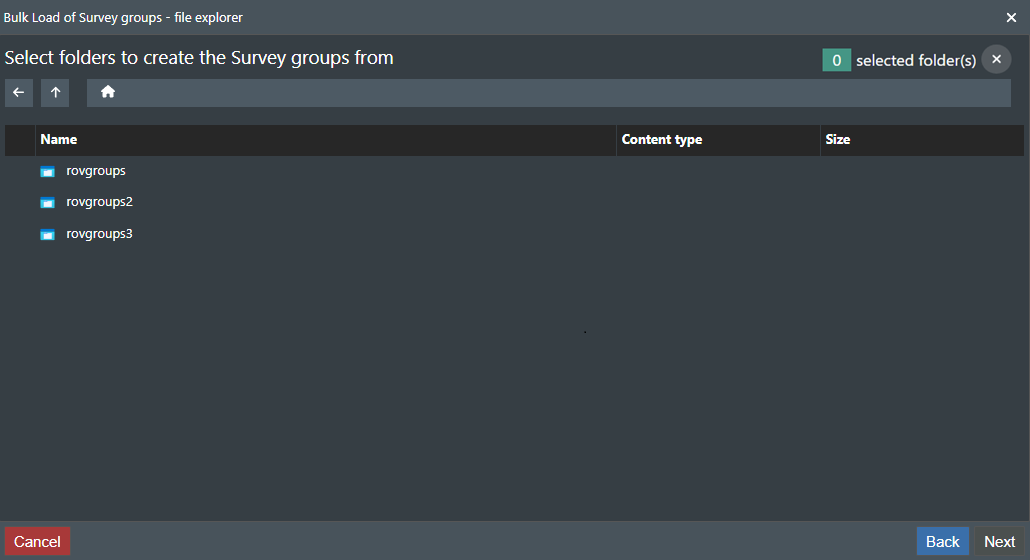
Once all settings are configured, clicking the button will visualize the following page:
 navigates to the previous page.
Based on the SAS access level selection from the Azure Blob Storage section in FieldTwin Vision Settings page, either all folders or blob containers will be listed in the table.
Navigating through the folders will update the path at the top of the page:

Clicking on the name of the folder will navigate back to it. Additionally clicking the  icon will navigate to the outermost (root) folder.
In addition the following buttons can be seen:
 navigates to the folder that was previously opened.
 navigates to the parent folder.
The field on the far right shows the number of currently selected folders from the Azure storage:

Clicking the  button will clear all selected folders
Any number of folders can be selected. This happens by clicking the checkbox on the left of the folder name:
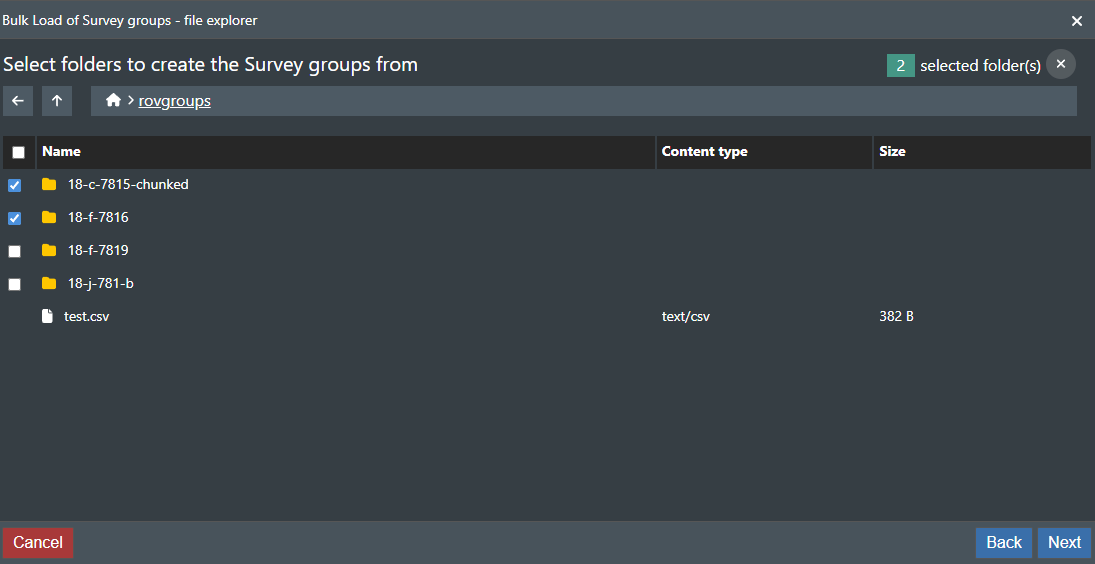
Once the desired folders are selected, clicking the button will visualize the following page:
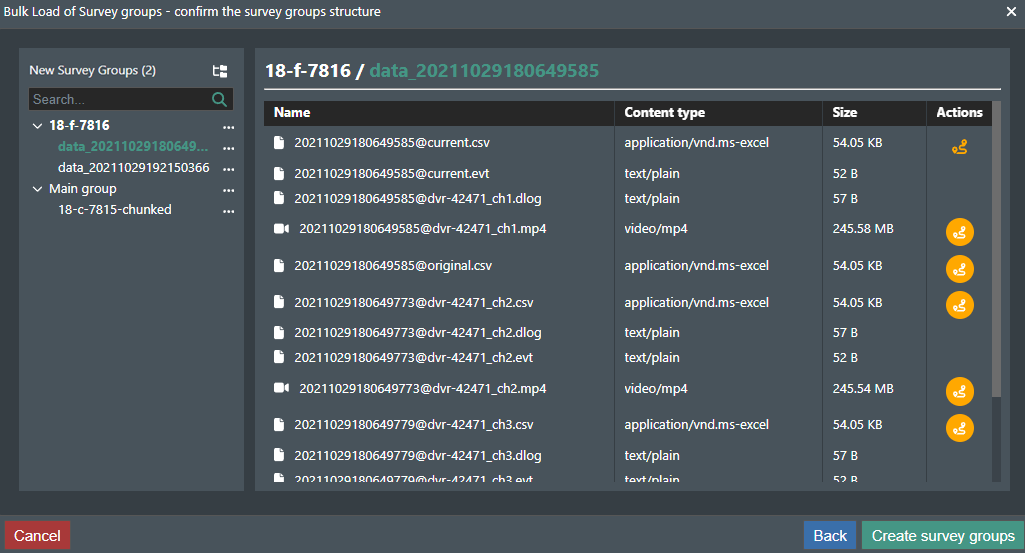
Depending on the folder structure option selected in the previous step, the generated survey groups will be structured in the tree view either matching the Azure storage folder structure or grouped under the respective top level folder. They are displayed in the tree view section on the left.
The tree has the following actions:
- add new top level folder.
- expand all nested levels if collapsed or collapse them if expanded.
Note: If a warning icon appears in front of a survey group name, it indicates that no file has been selected for survey path generation for that survey group.

Next to every group, there is a hamburger menu.
Clicking on  opens it and shows the options to add a new folder, rename or delete the corresponding group
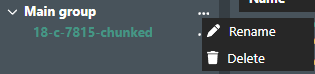
There is a possibility to add new folder, move the current folder or a survey group to a new destination, rename or delete the folder or survey group.
Check Actions for more detailed overview of the available options.
In the main table visible on the right, if the selected survey group contains only one video per channel, all files will be listed directly.
The file used for generating the ROV survey path can be changed by clicking the  button visible on the end of each row:
Note: Generating the path from the video files can take longer, and depends on the length of the video.
If a survey group contains multiple videos from the same channel, it is treated as a chunked survey group. In this case, files are grouped by channel into separate accordion sections.
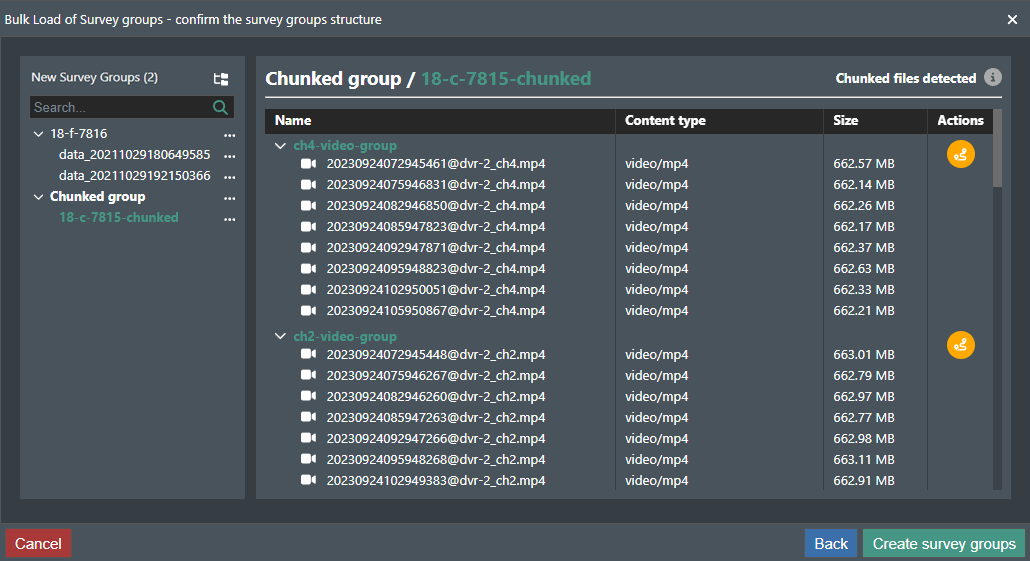
Note: This requires the channel identifier and timestamp identifier for each file name to be pre-configured in the Channel identifiers field located in the FieldTwin Vision Settings under the ROV Settings tab.
If a chunked survey group is being previewed, at the top right of the file table, a  toggle will be visible, allowing the user to decide whether to process the survey group as chunked or standard.
If the survey group is being processed as chunked, the videos and coordinate files will be merged together, resulting in one long ROV survey path visualized in the FieldTwin Designer as well as a single video (per channel).
Each accordion can be collapsed using the button visible on the left of its name.
Clicking on  will close the dialog and start the Survey group creation process.
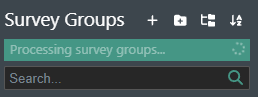
Once the status indicator appears at the top of the tree view, processing has already started and it is safe to close the integration.
Move to...
The "Move to..." option in the hamburger menu allows you to move the current survey group or folder to a different location in the tree view. Selecting this option opens a modal where you can choose the destination from a dropdown.
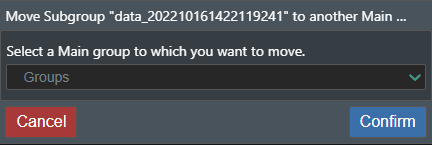
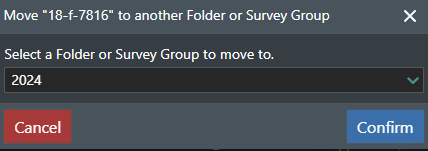
Clicking "Confirm" will complete the transfer.
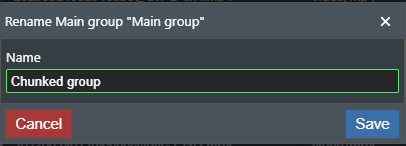
Rename
To rename a folder or survey group, select the "Rename" option from the hamburger menu.
A survey group can also be renamed by clicking on the icon next to the name.
Then enter the new name and click "Confirm".
Delete
To delete a folder or survey group, select the "Delete" option from the hamburger menu.
A survey group can also be deleted by clicking on the icon next to the name.
Then approve the confirmation popup.
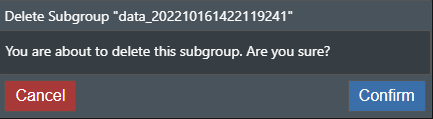
If the item contains nested folders or survey groups, a tree view will be displayed showing a preview of all content that will be deleted.
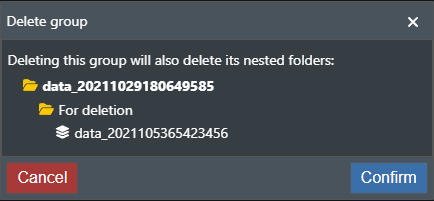
This tree view preview is shown whenever deleting any item that contains nested folders or survey groups.
Main list of survey groups
Upon selecting a main folder, a list of its contained survey groups and folders will appear.
The list of survey groups contains three columns:
- Thumbnail, which is a set of images taken when the cover video was processed.
- Details, which include the current processing status of the survey group and the settings filled during the creation.
- Files, which shows the uploaded and media files of the survey group.

Clicking on the name of any survey group will change the current view from the group list to the currently selected survey group's page.
FieldTwin Vision User
The FieldTwin Vision User integration can be accessed through FieldTwin Designer.
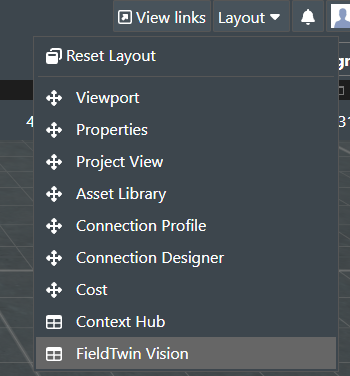
To do so, click on "Layout", then "FieldTwin Vision" or however you have named the integration in the admin part.
Overall view
This is how the FieldTwin Vision User integration looks like.
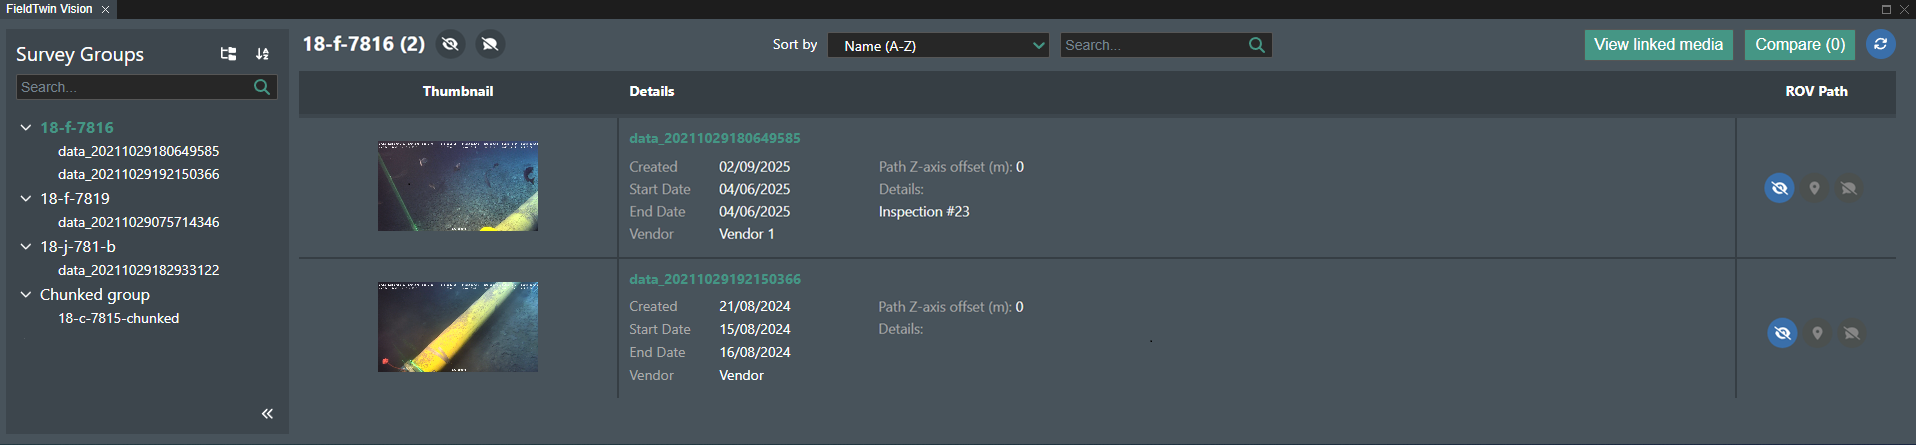
Note: Survey groups with Pending, Processing, or Failed status are not accessible from this part of the integration.
Tree view
The tree view allows you to access all available folders and survey groups for the current project.
These are the tree actions.
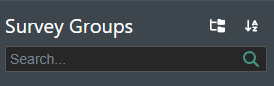
- expand all nested levels if collapsed or collapse them if expanded.
- sort the groups alphabetically (A-Z) or (Z-A).
 configure the Range Filtering settings.
The search bar allows you to find any group which contains either a folder or survey group with the input.
At the bottom is a button for hiding the tree.
- shrink the horizontal size of the tree.
can be used to expand the tree back to its original size.
If the integration window is moved to a vertical view, the Survey Groups can be expanded using the  button.
Range filtering
The menu for configuring the range filtering can be accessed by clicking on the button from the tree view header.
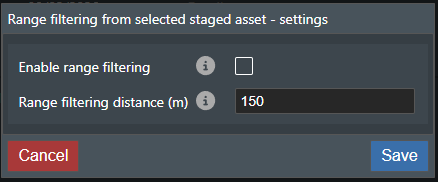
The modal contains the following settings:
- Enable range filtering - toggle on and off the range filtering functionality.
- Distance - set the maximum distance between the selected asset and the Survey path.
When enabled, the functionality automatically filters Survey Groups near the currently selected asset based on the specified distance.
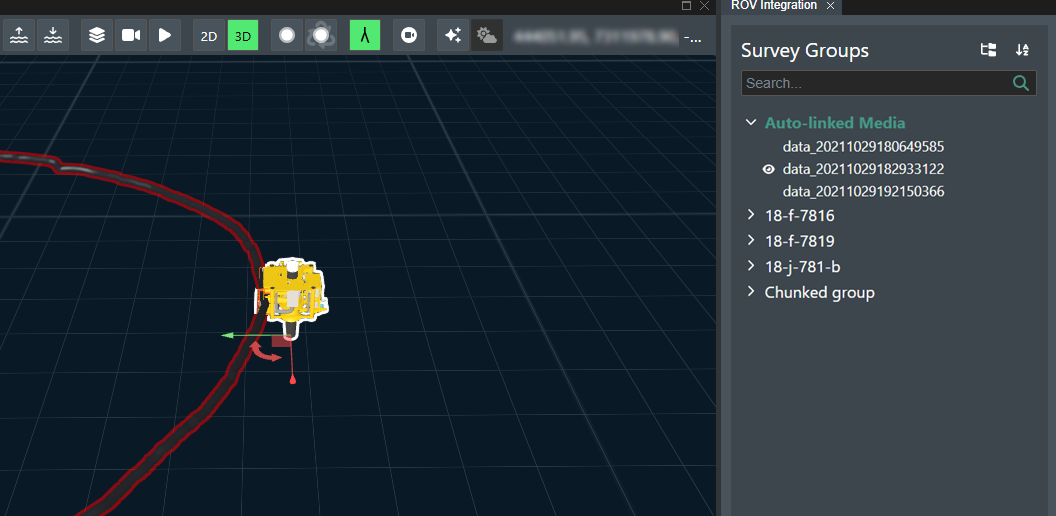
Group list
Upon selecting a top level folder, you will see its name at the top header section.

Following the name, these two toggles can be seen:
 toggle on and off the virtual ROV paths in the viewport for all survey groups.
 toggle on and off all comments in the viewport for all survey groups.
In the middle, there are options for sorting the folders / survey groups and searching for any of their properties.
The default sorting is by the survey group names (A-Z), but you can change it to one of the following options:
- Newest First
- Name (A-Z)
- Name (Z-A)
- Start date
- End date
- Vendor
Located at the end of the header section, there are buttons for direct access to the Linked media and Compare views, as well as a button for reloading the integration if new changes have been made in the Admin section.
If a folder contains other inner folders, a collapsable section will be displayed at the top of the list, allowing you to show or hide the folders.
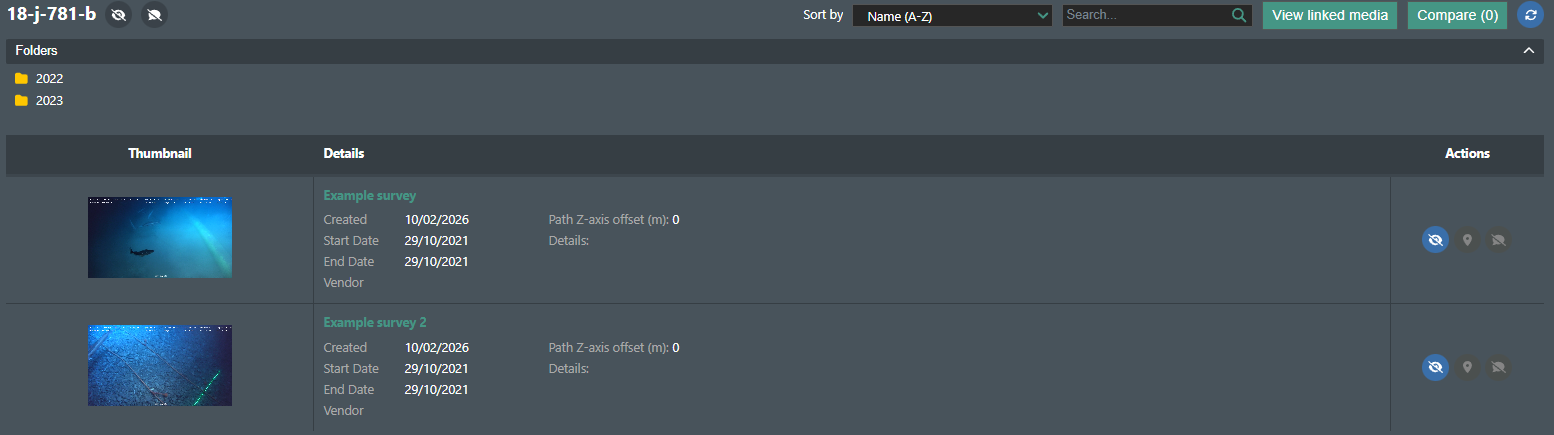
Survey groups are displayed in a table, each showing a thumbnail from its cover video (if available), details, and ROV path actions.

The details include:
- Name of the survey group.
- Created Date.
- Start Date.
- End Date.
- Vendor.
- Path Z-axis offset (m).
- Details.
The actions allow:
 toggle on and off the virtual ROV path in the viewport. The rendered path is also automatically zoomed in.
 zoom in on the ROV path in the viewport. Active only if the ROV path is rendered in the viewport.
 toggle on and off all comments in the viewport. Active only if there are comments.
When a ROV path is rendered in the viewport, an indicator is displayed next to the corresponding survey group name in the tree-view on the left.
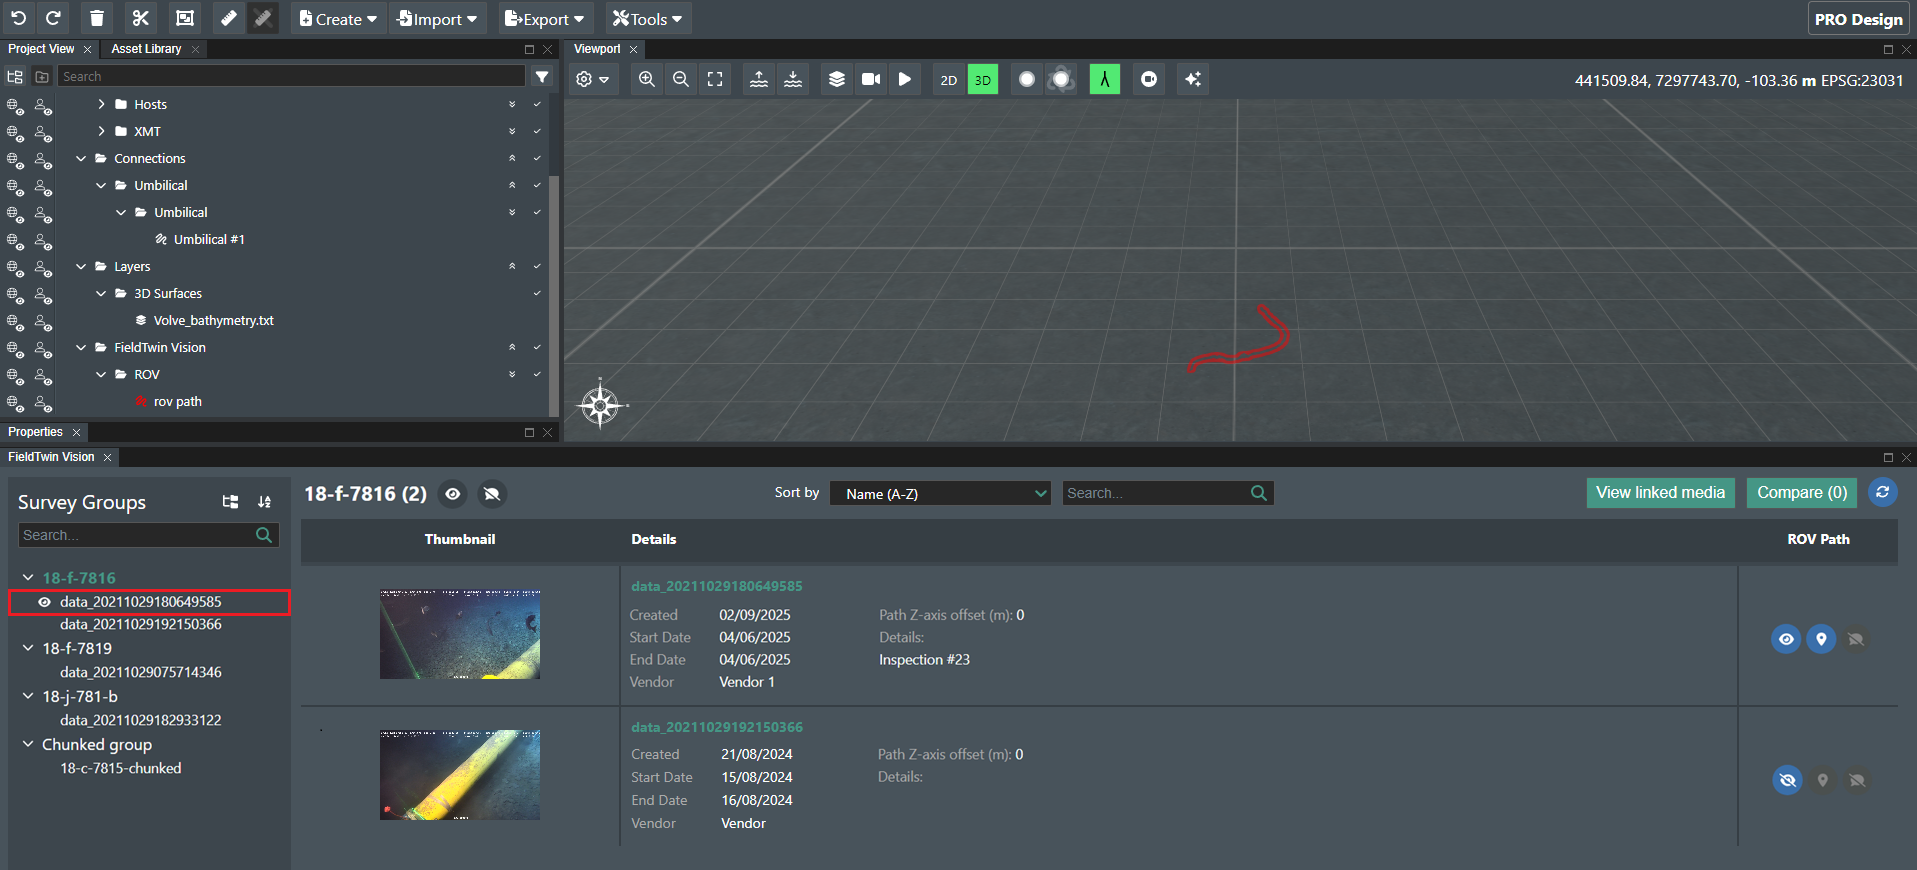
Folder view
Upon opening a folder, this screen will be visualised.

All contents of the folder will be displayed in an accordion. Clicking on any of the items will open their respective view, which is the same as if they were accessed from the tree view on the left.
Survey group view
Upon opening a survey group, this screen will be visualised.
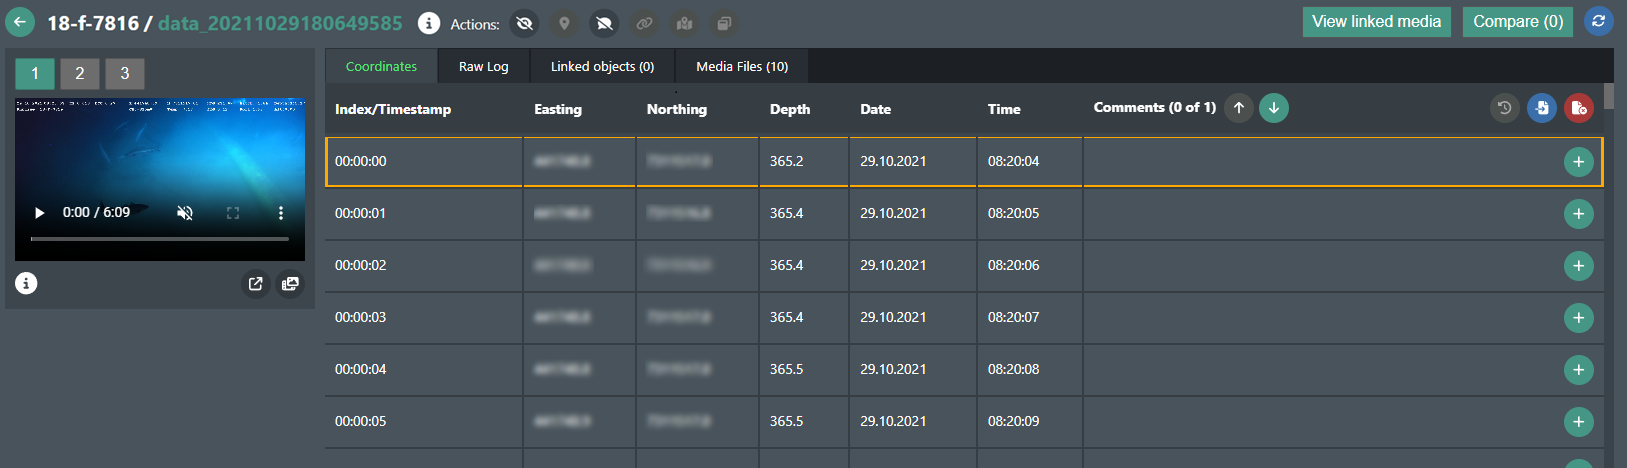
Top view menu
In the top view menu, you can see the folder's name, the current survey group's name and the survey group's action icons.

 hover to view the detailed information about the survey group.
- toggle on and off the virtual ROV path.
 zoom in on the ROV path in the viewport. Active only if the ROV path is rendered in the viewport.
- toggle on and off all comments in the viewport.
 link one or many selected objects in the viewport to this survey group. Those objects will then appear in the "Linked objects" tab, where you can view and unlink them.
 generate coordinates for the survey group by selecting a connection asset in the viewport and clicking on this icon. Note that you can only generate coordinates for the survey group if you haven't already done so in the Admin part of the integration using a CSV file.
 remove coordinates generated from a connection asset.
 bring all opened PiP windows to focus.
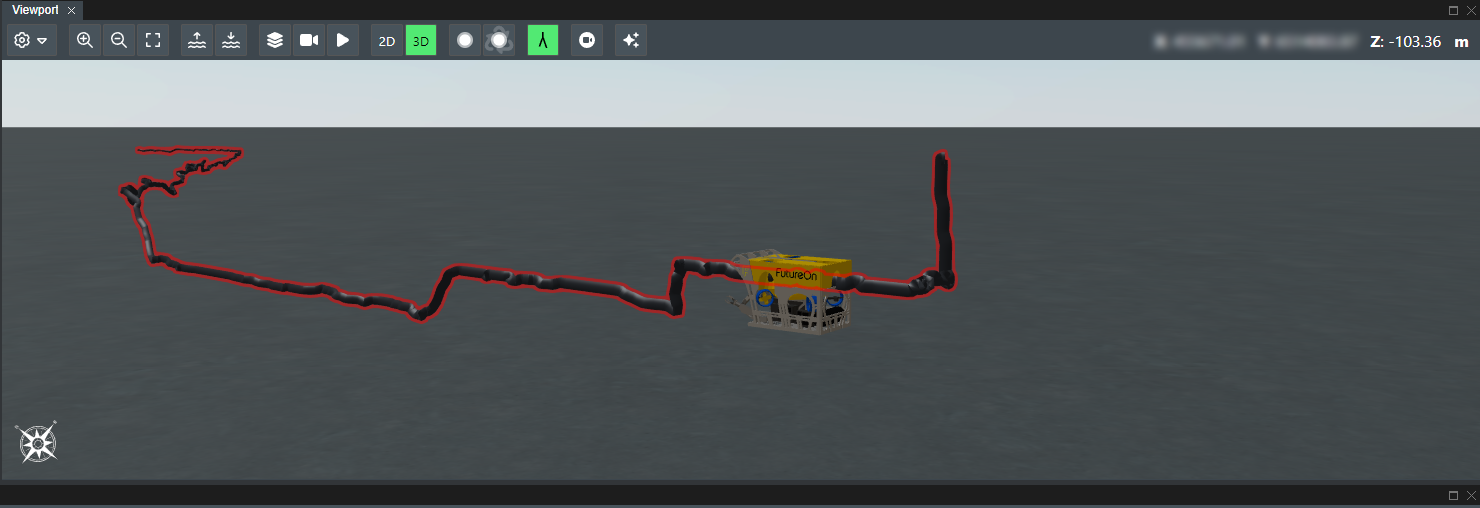
Toggling on the ROV asset and path will display them on the viewport like this.
The ROV is moved to its coordinate position for each index of the video.
Clicking on the button for generating coordinates from a connection asset after selecting one will open a popup, which asks for a confirmation of the starting point of the inspection.
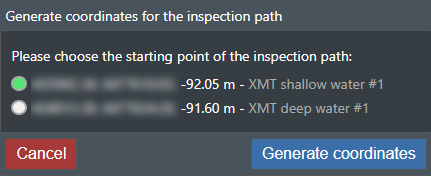
Clicking on "Generate coordinates" will trigger the generation.

After the survey group coordinates are generated from a connection asset, the button for generating them will be replaced with a new button, which allows removing them.
Clicking on it will open a confirmation popup.
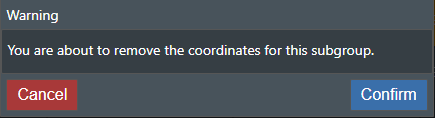
Nested Folders and Survey Groups
If the survey group contains folders or other survey groups, they will be displayed in a collapsable section at the top of the page.
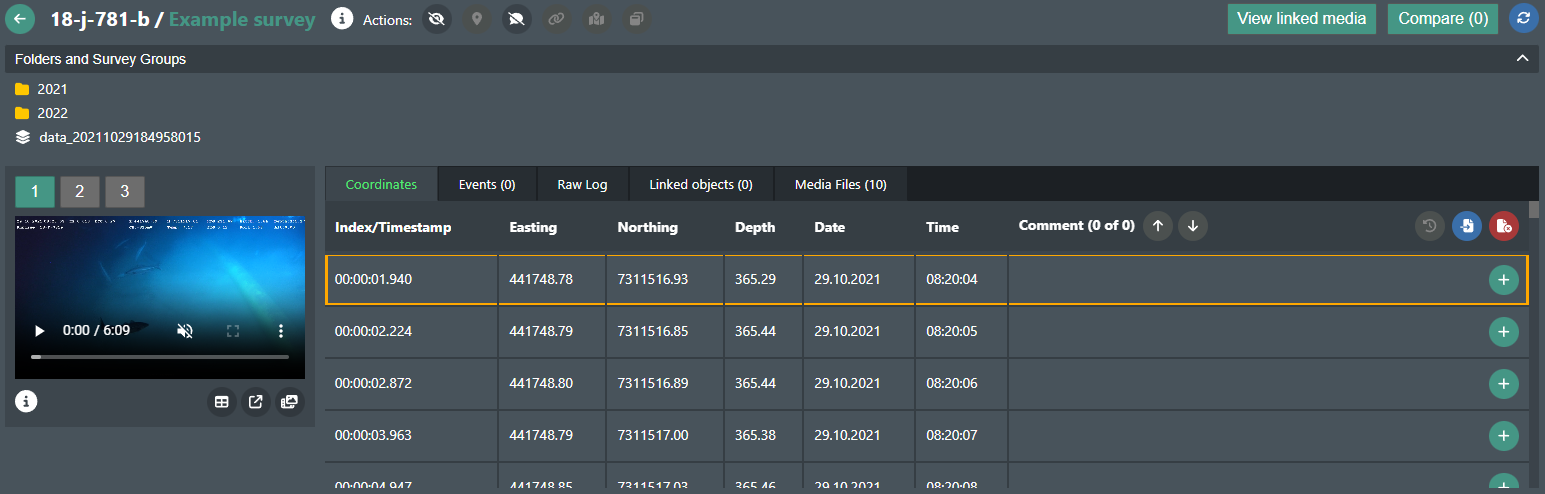
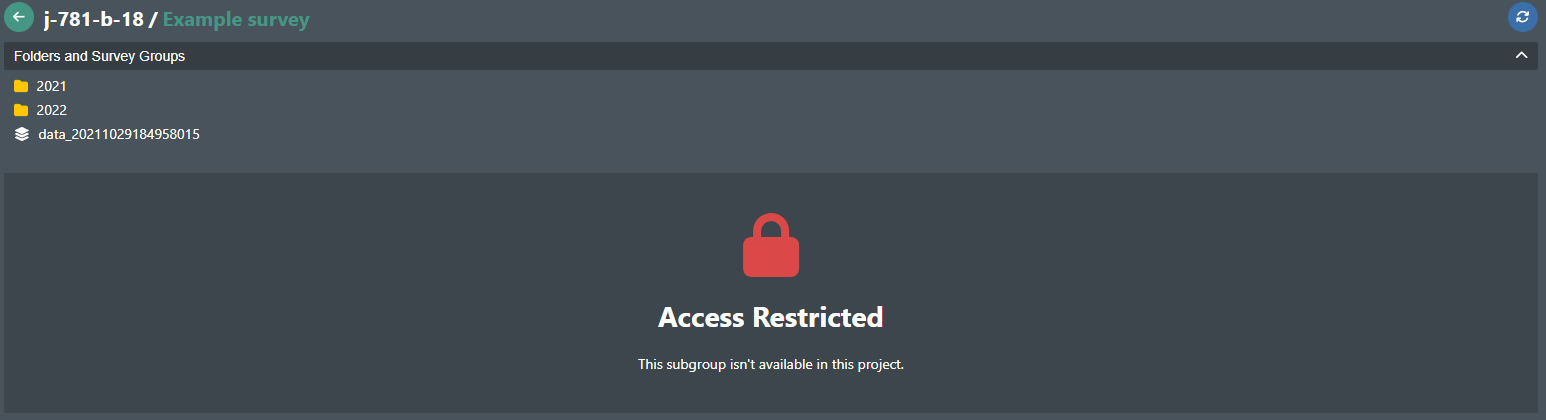
In the case where the project has access only to the nested survey group and not the parent, the following screen will be shown.
Video Controls
You can switch between all the processed videos within the survey group by navigating to the desired one through this menu.
Below this menu is the video player. This is a standard browser player that you can use to play and pause the video or drag the slider to jump to a specific time.
You can also mute/unmute the video, change playback speed, download it, or open it in picture-in-picture mode.
Below the video player, you can find the custom controls menu.

- hover to view the video name.
 open all video channels in a new window as a group.
 enable or disable the Picture in Picture mode.
 add this video for a comparison view, that can be accessed by clicking on the "Compare" button in the top right corner.
Standard Picture in Picture mode
To enable Picture in Picture mode for the current video, click on the button. This will open the video in a new window, where you can use the standard video controls to play/pause, change the playback speed, or jump to a specific time.
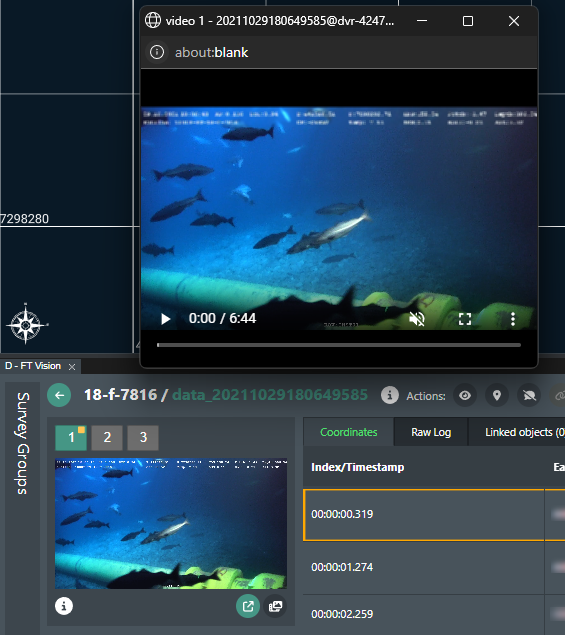
A yellow marker will also appear at the top right of the channel number, indicating that there is a PiP window opened for this channel.
Group Picture in Picture mode
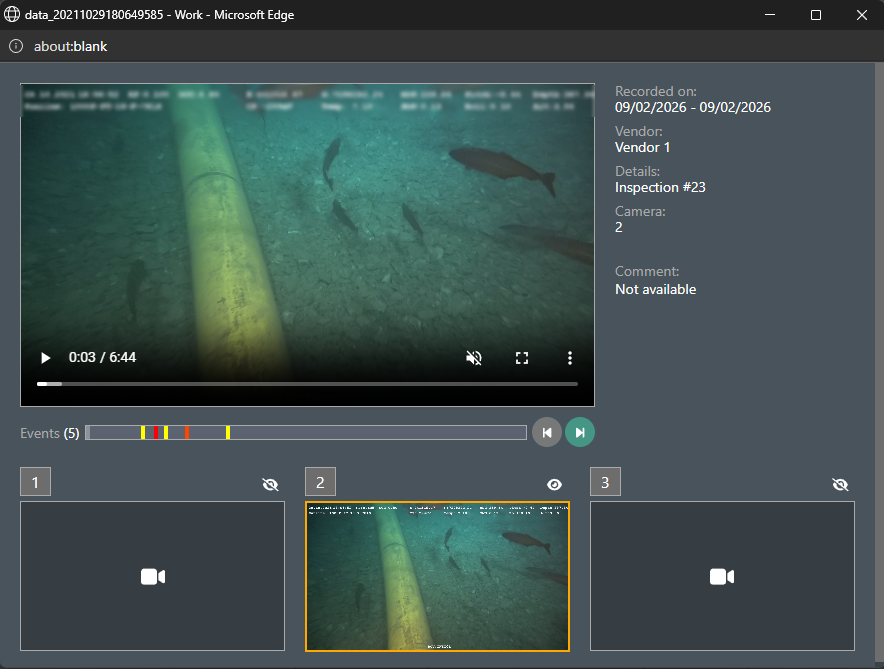
Clicking the button will open all video channels from the survey group in a new window in Picture in Picture mode, while keeping them grouped together.
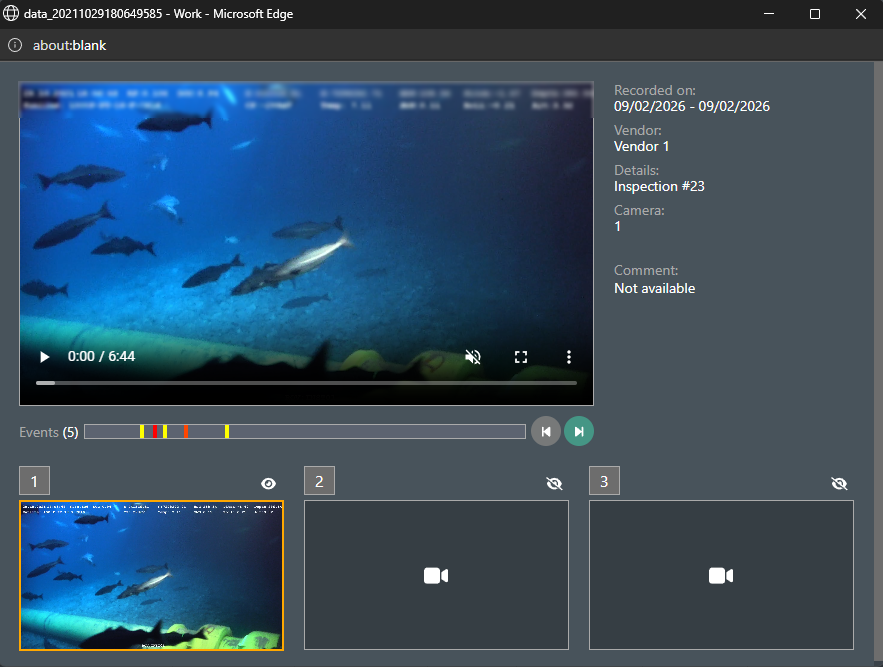
The main video player (the only one with controls) will play the feed from the first opened video, but all channels will be synced together.
On the right of the main video player, a list with video details is shown:
- Recorded on: the date when the video was recorded.
- Vendor: the vendor of the survey group.
- Details: any additional details about the survey group.
- Camera: the channel currently pinned as the main video.
- Comment: comments related to the current video timestamp.
Below the main video player, an events timeline is visible, which shows all comments related to the current survey group.

Hovering over any of the events will show a tooltip with the comment text and timestamp. Clicking on the event will make the main video jump to the timestamp of the comment.

The buttons on the right of the timeline allow you to skip directly to the next or previous event.
At the bottom of the window, all video channels are shown as thumbnails. By default only the main video playing is visible, but you can toggle the visibility of the other channels by clicking on the  next to each one.
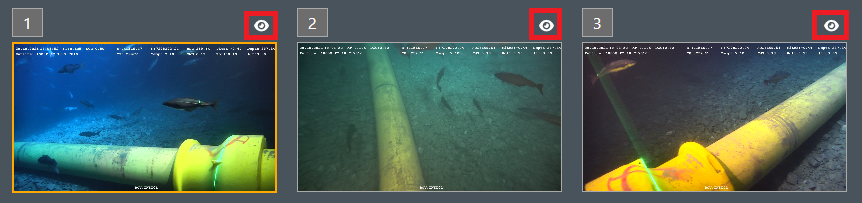
Clicking on a different video channel will load it to the main video player instead. The currently selected main video channel is highlighted with an orange border.
Survey group tabs
There are five tabs for each survey group.

In the "Coordinates" tab, you can view the processed CSV coordinates or the automatically generated coordinates.
They include the video index/timestamp, easting, northing, depth, date, time, and comments.
The current video index is highlighted in orange and updates every second while the video is playing.

On the right side of the Comments column is the current comment number and the total amount of comments for these coordinates, together with buttons to move to the next and previous comments.

 move to the previous comment.
 move to the next comment.
To the right is the menu for managing the comments.
 undo the last change made to the comments.
 import comments from an Excel file.
 remove all of the comments for the current video.
There are two options for adding comments.
- Import from an Excel file.
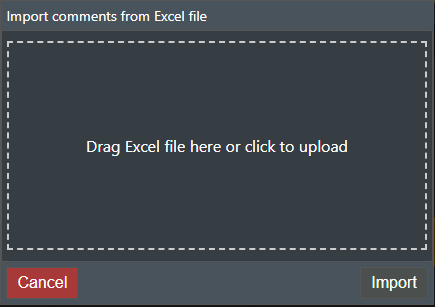
Drop your Excel file into the upload area and wait a few seconds for it to be uploaded and processed.
A new screen will appear asking you to select which sheet to import comments from and which row index contains the table headers.
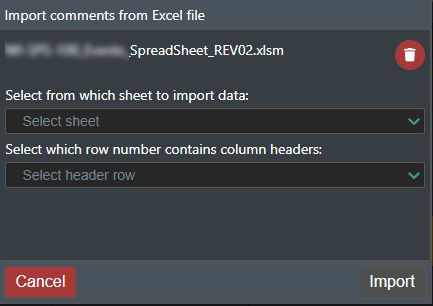
The start date and time will be pre-filled with the first entry from the raw log table if available.
If the table doesn't contain all necessary columns, you will be prompted to map each missing column.
If the index column isn't found, you will be prompted to specify the inspection's start date and time.
Note that seconds are crucial for accurately matching comments to coordinate indices.
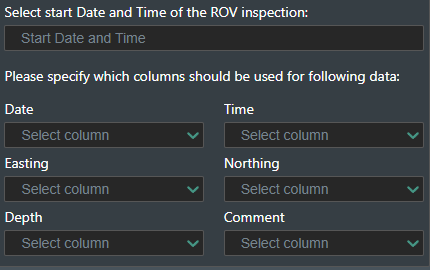
All missing columns will be saved for future use and you won't be asked to fill them again if your Excel table doesn't change.
After all of the columns have been verified, the "Import" button will activate and you can click it to finalize the comments import.
You will see all of the imported comments in the visualization by default.
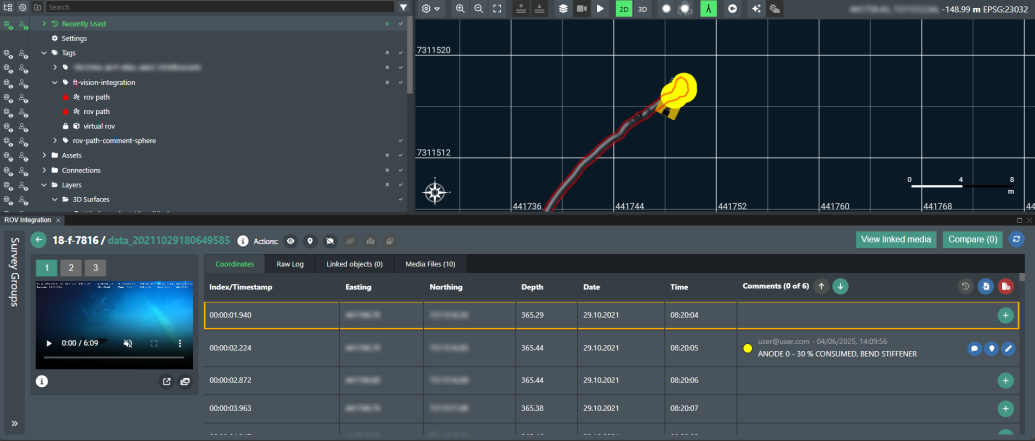
- Manual, by clicking on the
 icon for the desired index.

Enter the comment text in the newly opened input field. The priority of the comment can also be changed by clicking on the color indicator.
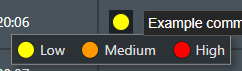
Clicking the  icon will save the comment and
  will discard the changes.
After saving, the comment will be created and you will see the icons at the end change. The person who created/updated the comment will also be shown, as well as a time-stamp indicating when the action occurred.

 toggle the visibility of the comment inside the viewport.
 locate the comment inside the viewport.
- edit the comment.
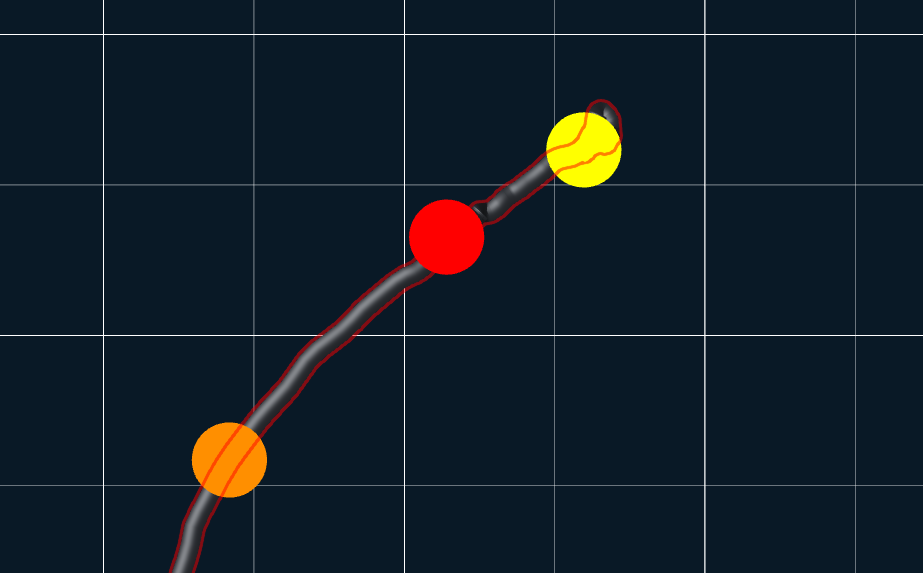
If the comment is visible, a sphere with the selected priority color will be shown on its location inside the viewport.
Clicking on any of the comment spheres along the ROV path will make the current video and coordinates jump to this location.
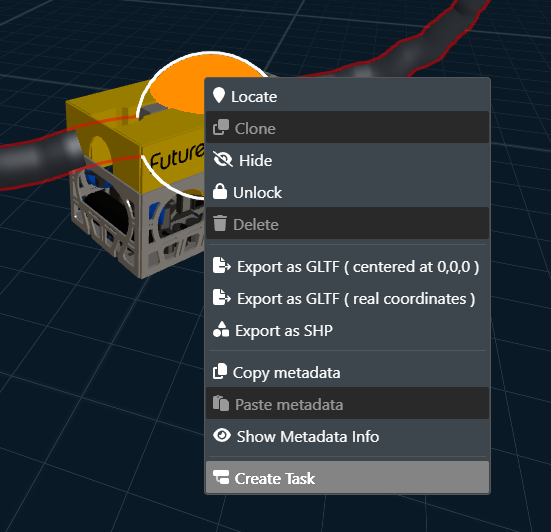
Right clicking on any of the spheres opens a menu. Selecting the Create task option will open a new window from which a task can be created which will appear in the Workflow dashboard.
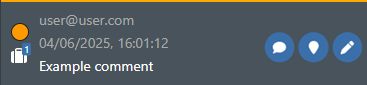
If a comment has a task linked to it, an additional icon will appear in the comment section.
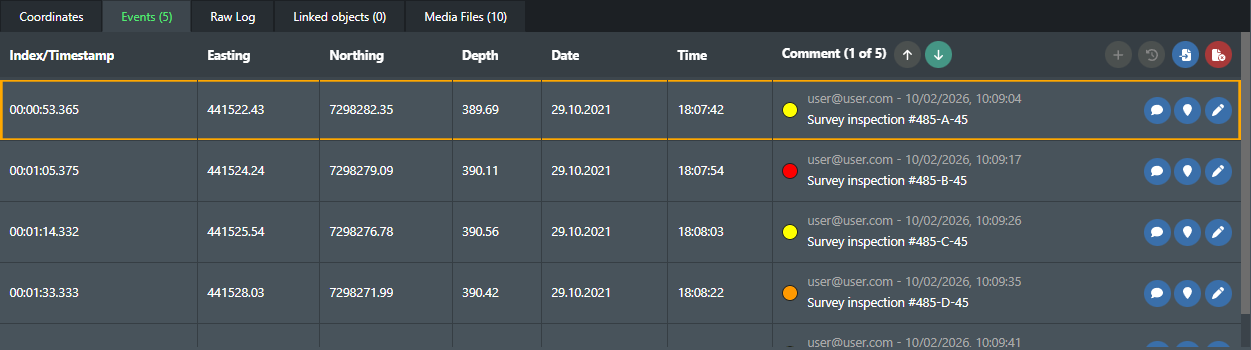
In the Events tab, you can view all comments as a list, sorted by their timestamp. Each comment shows the date and time it was created, the comment text, and the video index it is linked to.
In the "Raw log" tab, you can view a table containing all columns from the unprocessed CSV file. The current video index is highlighted in orange, just like in the coordinates tab.
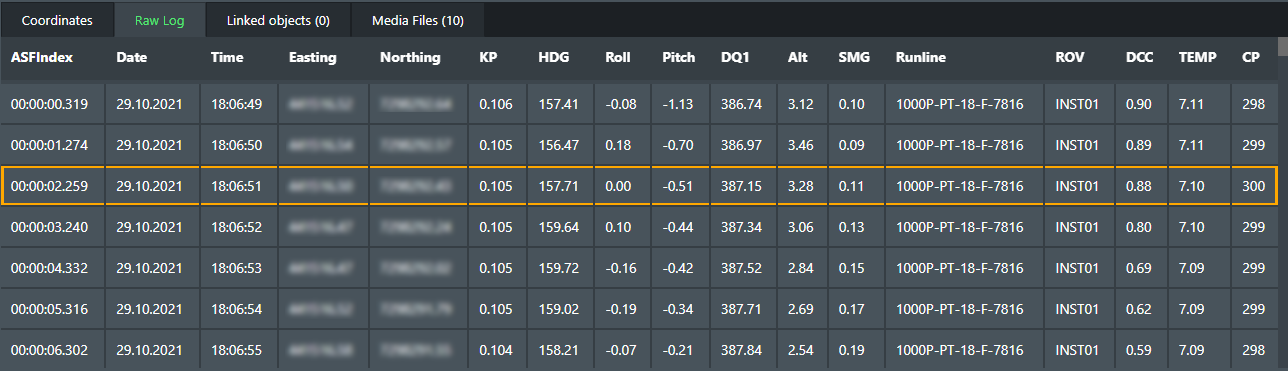
If the easting, northing, or depth values differ by more than 1000 meters from the previous valid value, they will be marked as invalid and the row will be excluded from the coordinates tab.

In the "Linked objects" tab, you can view all objects linked to the current survey group, locate them in the viewport, and unlink them.

The following actions can be performed:
 export all currently linked objects to a CSV file.
 import linked objects from a CSV file.
Each linked object visible in the table, has the following options:
- locate the linked object.
 unlink the object from the survey group.
In the "Media files" tab, you can view all processed video files, the coordinates file, and any other files uploaded by the administrator.
For each file, you can see its name, creation and update timestamps, and download it.

Linked media
Click on the "View linked media" button to enter the Linked media view.

There are two tabs inside - "Current selection" and "Current viewport".
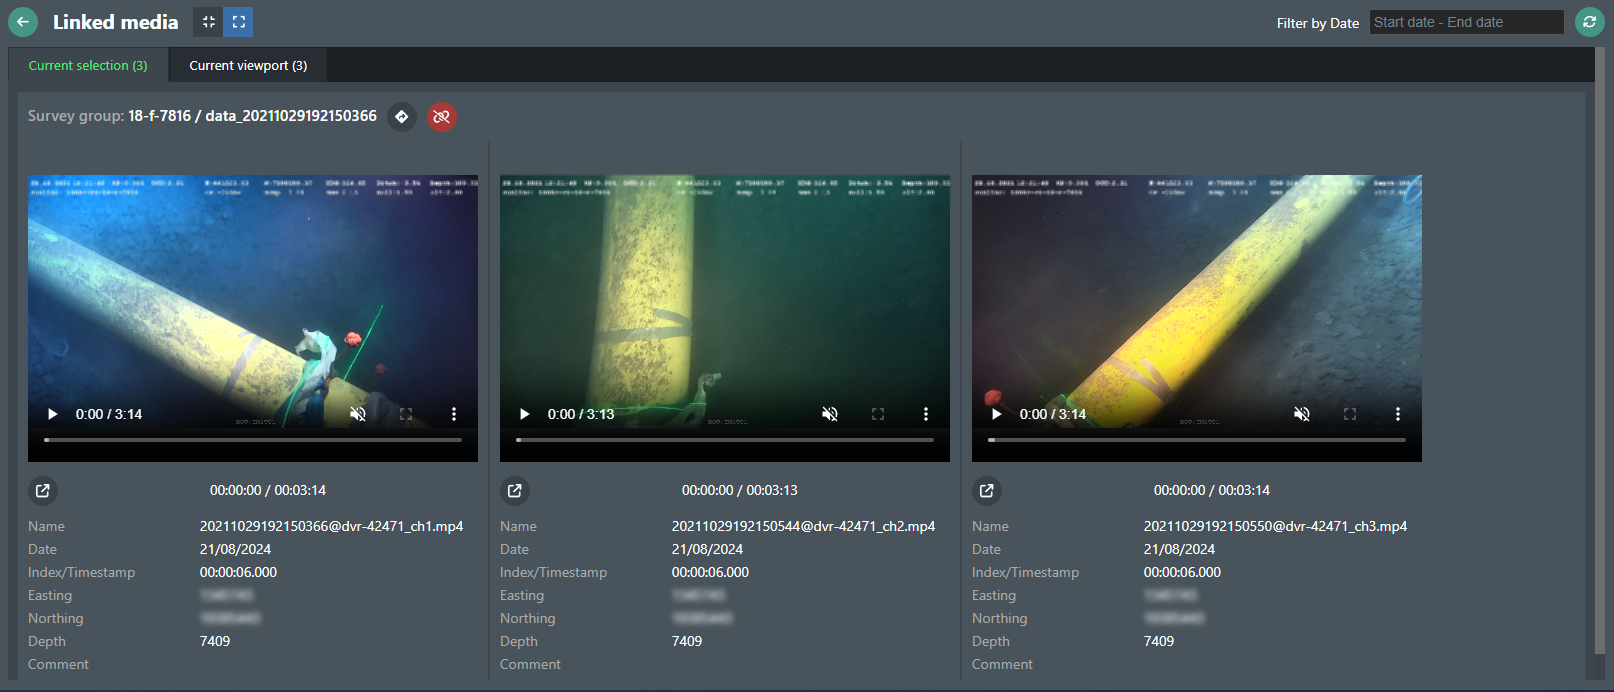
- Current selection
When you select an object in the viewport that is linked to any of the available survey groups, you will see the survey groups and their videos appear on the screen.
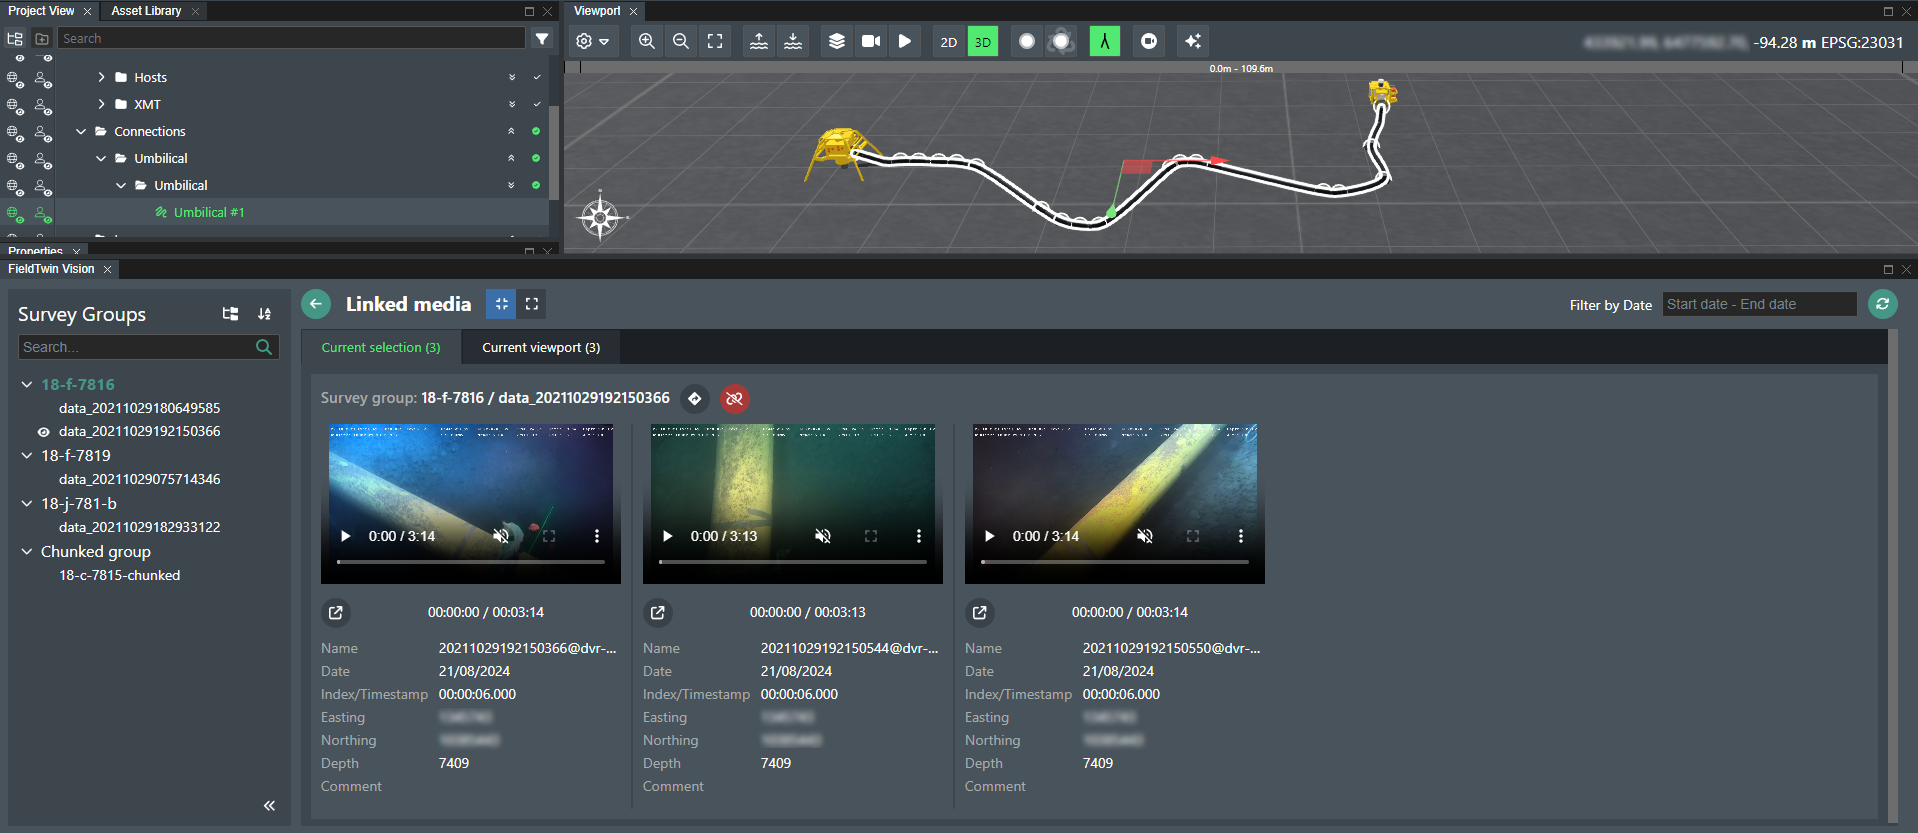
Next to the survey group's name, there are options to:
 go to the survey group containing the linked media.
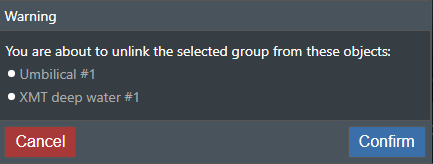
 unlink the survey group from the selected objects.
Upon trying to unlink, a confirmation popup will appear.
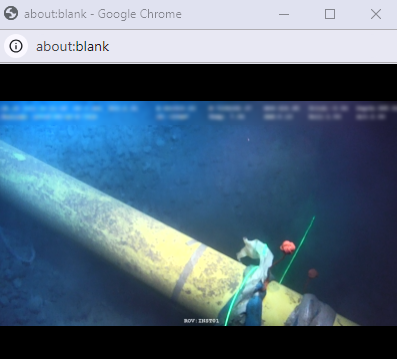
Underneath each video player, there is an option to open the video in a popup:
- toggle the video popup.
Multiple popups can be opened simultaneously and distributed across different monitors in full-screen mode, but performance may degrade when more than three videos are playing concurrently.
Switching between these buttons enlarges and shrinks the video size.

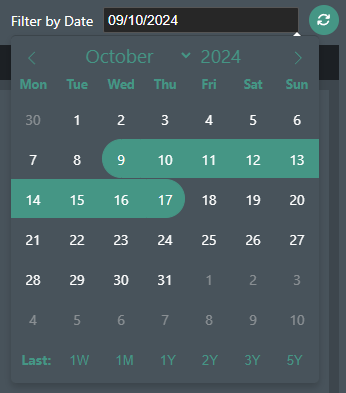
You can also filter survey groups by date.
Select a specific range by clicking the start date followed by the end date.
Predefined ranges such as last week, last month, and last year are also available.
- Current viewport
Shows all of the linked survey groups and their videos to all objects that fit within the current viewport.
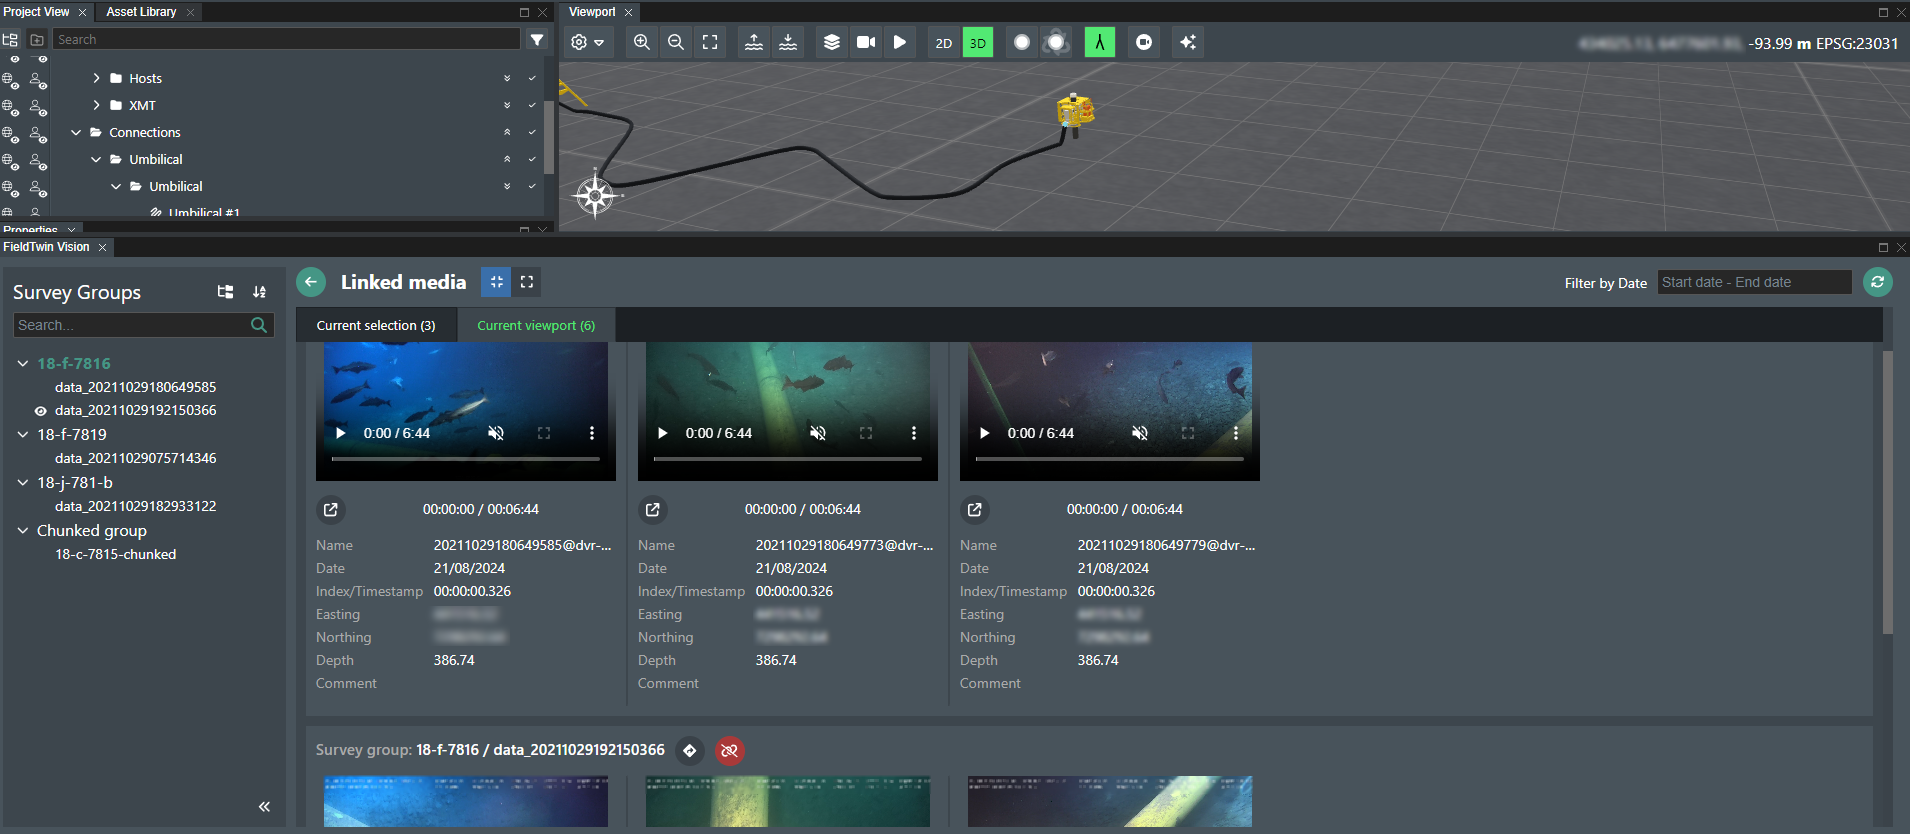
If you have moved the current viewport after opening this view, you will have to click on the  icon in the top right corner to refresh the data and see the updated result.
Compare view
There are two modes for the Compare view:
- Compare by Date & Time
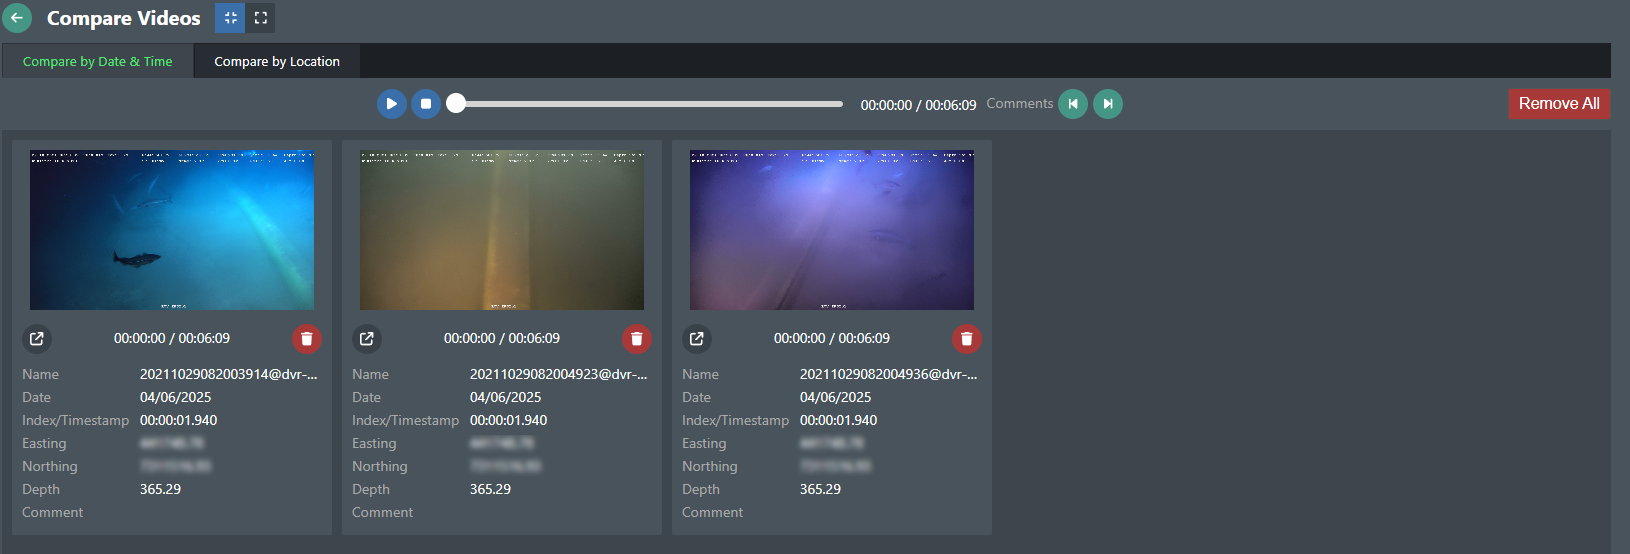
At the top, you will see a synchronized player, where you can play, pause and stop all of the selected videos at once, and also jump to the next and previous comment from all videos.

 play all videos.
 pause all videos.
 stop all videos.
- move to the previous comment.
- move to the next comment.
For each video, you can view its name, date, current index/timestamp, easting, northing, depth, and comment.
While videos are playing, these properties update every second, allowing you to compare not only the videos themselves but also the comments at each index.
Underneath each video are icons for toggling the video popup and removing the video from the comparison.
- toggle video popup.
- remove the video from the comparison.
At the top right corner is the "Remove All" button, which will empty the comparison list.
- Compare by Location
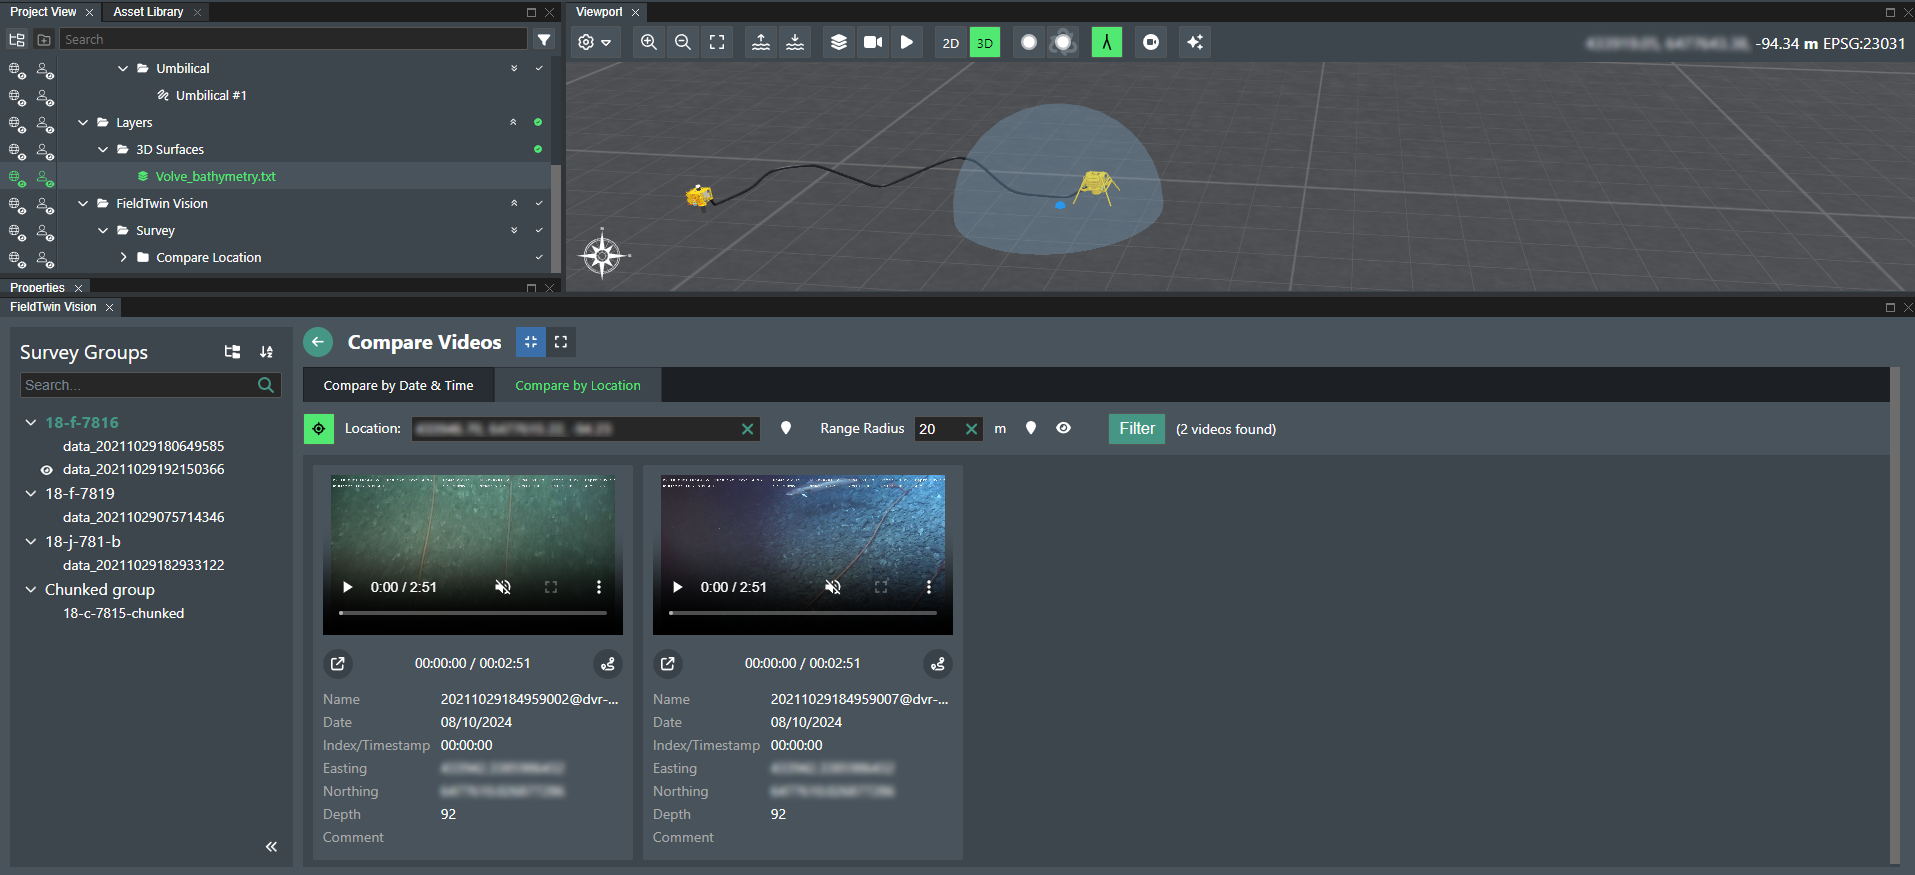
This comparison mode allows you to select or manually input coordinates and a radius to filter and display videos located within that range.

Location actions:
 toggles the selection mode, which allows you to select an asset and automatically fill in the coordinates.
- finds the location center sphere.
Range radius actions:
- finds the radius sphere.
- toggles the radius sphere.
After manually inputting the location by entering the X, Y, and Z coordinates or using the automated selection tool, you should click on the "Filter" button and if there are any videos from this location, they will be shown.